Eldar Eagle
Farseer command vehicle
I designed this vehicle myself and based it on the versatile Falcon chassis. I envisaged it as a dedicated transport and mobile command vehicle for a Farseer, crewed by Warlocks and able to amplify psychic powers. Its role on the battlefield is to provide support to the Eldar forces and to transport the Farseer to the front lines in relative safety. I decided to complete the turret separately and use that as a standalone option for a standard Falcon hull. Placing the turret on my kit-bashed Panther hull is now a much closer match to the original concept that I had in mind when I first started this project.Date: 2009-2012 (abandoned)
Components: 1x Falcon, 1x Forge World Type II Falcon conversion kit, 1x Wave Serpent, 1x Forge World Revenant Titan head, plasticard (various thicknesses), brass rod, styrene rod (various diameters), Green Stuff, flying base, 6mm diameter clear acrylic rod, neodymium rare earth magnets (various sizes), Eldar Warlock, Eldar Vyper console, Dire Avenger Exarch direswords, metal Farseer head, High Elf Archer arm, Dire Avenger shuriken catapult, Dire Avenger Exarch shimmershield arm
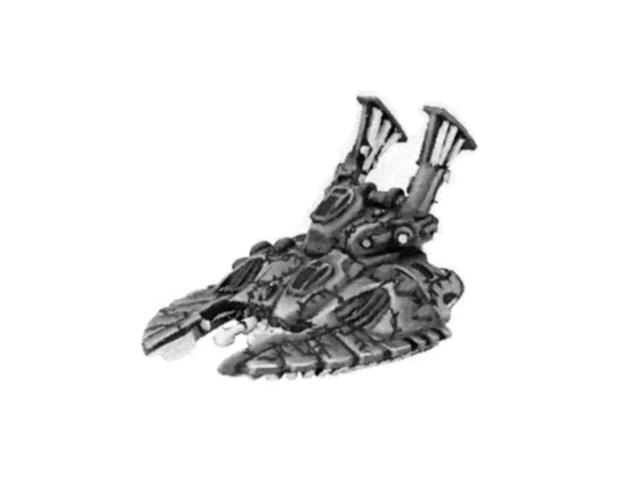
1. I used the design of this old Epic 40,000 "Farseer Falcon" miniature as a starting point for my own, newer design of vehicle.
Original image © Games Workshop.
Original image © Games Workshop.
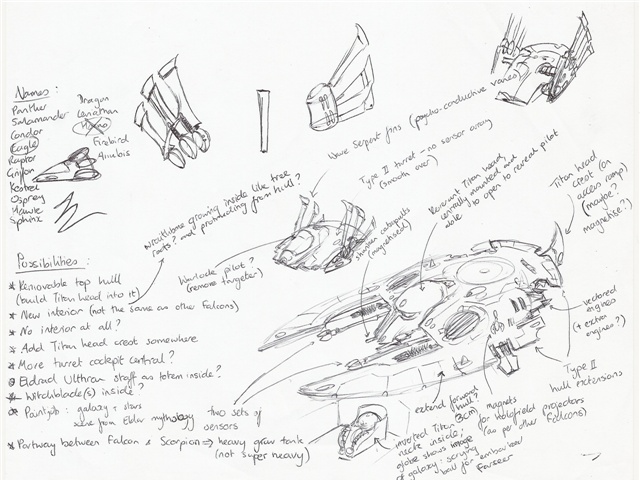
2. These sketches outlined my various ideas for the vehicle. The Eagle is meant to be larger than a standard Falcon but smaller than the Eldar's superheavy grav tanks.
These pieces came from the Wave Serpent kit.
Plasticard was used for the main bulk of this fin. Details were etched into the surface using the point of a needle file.
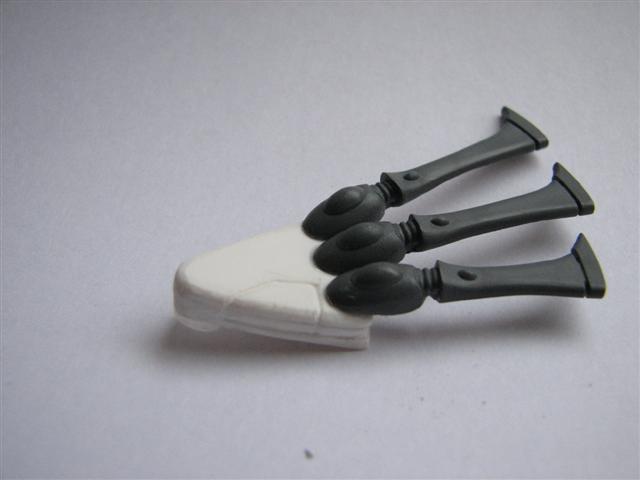
3. This piece is one of a pair and is part of the turret. It is meant to resemble the antenna-like "wings" on the original Epic 40,000 miniature and represent "psycho-conductive vanes" through which the embarked Farseer and Warlock crew can channel their psychic powers.
I used the Type II Falcon Forge World conversion kit for the turret.
A Warlock will crew this cockpit.
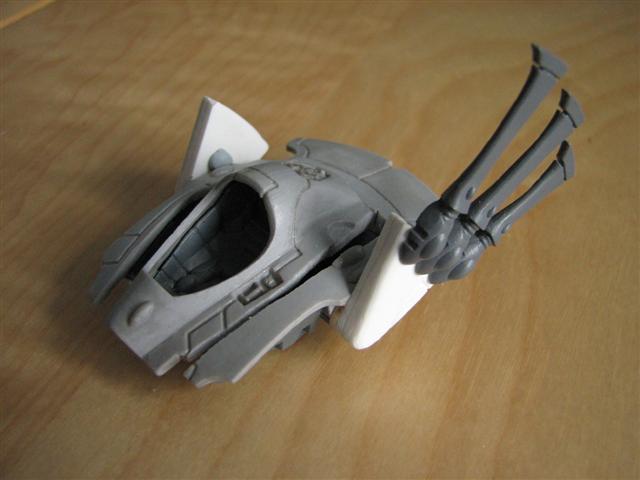
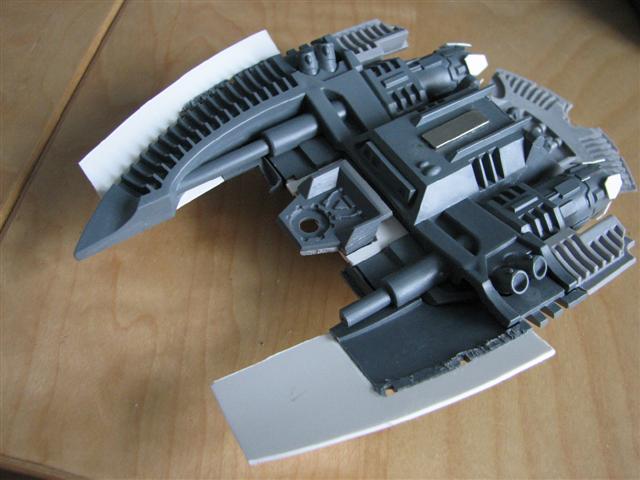
4. The turret, partway through construction. I decided to move the turret and vehicle cockpits so that they were aligned centrally, rather than offset (as they are on the standard Falcon chassis).
Like my Falcon conversions, the Eagle has a large magnet on the base of the hull that connects to a flying base.
The underside of the cockpit had to be removed and shifted over a few millimetres so that it was positioned in the centre of the ship.
I wanted the vehicle to be longer than a standard Falcon, so I extended the wings by around 3cm using plasticard.
The "vectored engines" upgrade was modelled using small wedges of plasticard.
The corrugated fins on the underside of the wings were removed so that they could be extended as part of the lengthening of the wings.
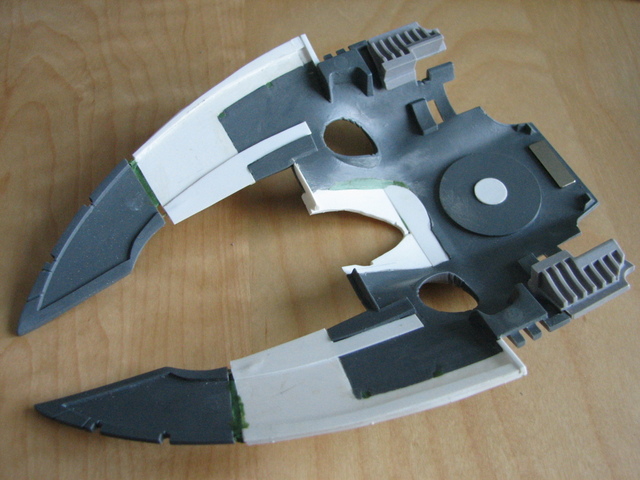
5. The underside of the Eagle's hull, with plasticard extensions added to the front "wings" to elongate the vehicle and make it appear more distinctive.
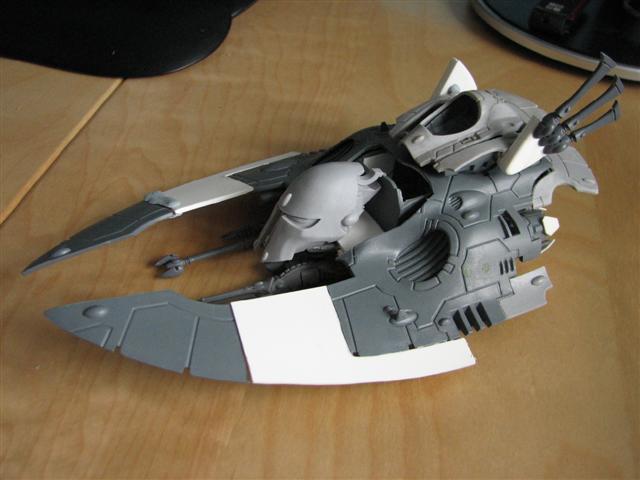
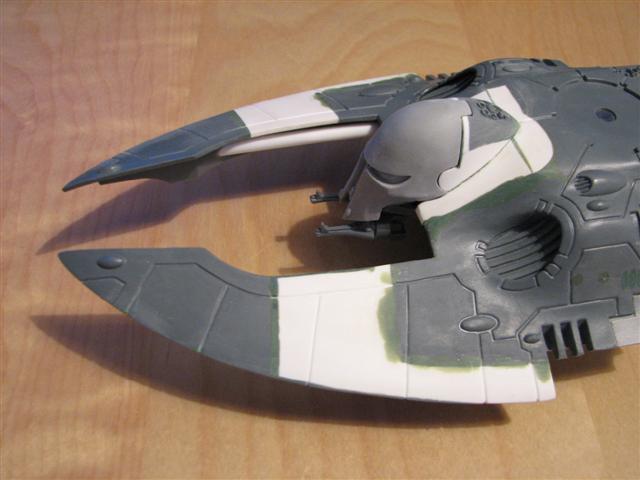
6. A mock-up of the vehicle, giving an impression of the end result that I was aiming for. I was pleased with how closely it resembled my concept sketches at this early stage.
The supporting pylons were made using styrene rods.
The extra sections of fins were taken from a spare Wave Serpent kit.
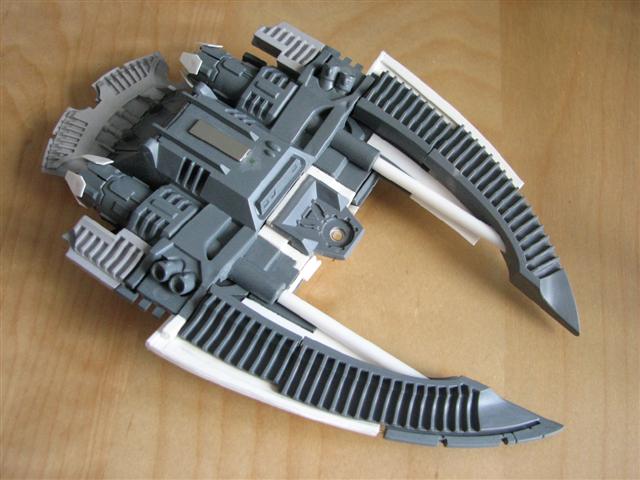
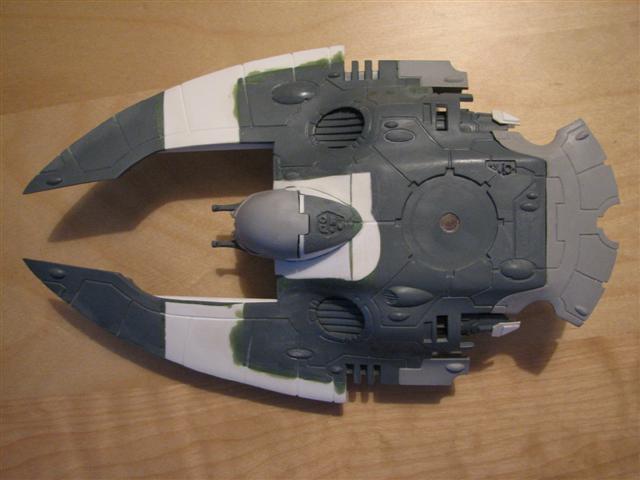
7. The underside of the Eagle, with the elongated sections of fins added.
Plasticard and Green Stuff were used to fill the gaps created by the realignment of the cockpit.
The joins were carefully filed down and sanded to create a smooth finish.
8. The turret, after the cockpit was repositioned centrally.
The centre of the hull had to be extensively remodelled to accommodate the new Titan cockpit.
Details on the wing extensions were created using a needle file.
The Revenant Titan head/cockpit was trimmed down to fit the front of the vehicle - the discarded neck was reused as part of the interior.

9. The Eagle continues to take shape.
This single magnet holds the upper hull firmly in place but allows it to be easily removed so that the detailed interior can be viewed.
More plasticard was used to blend in the wing extensions with the shape of the existing hull.
The ends of the wings were reattached using brass rod to pin them to the plasticard.
10. The underside of the upper hull - this can still be detached from the rest of the vehicle, despite the large number of bits that have been added and removed.
11. A close-up picture of the extended wings, now complete. As with the turret, a combination of Green Stuff and lots of careful filing and sanding produced a smooth transition between the different component parts of the wings.
There is normally a rectangular vent here; this was removed for the Eagle.
Small fins protrude from the regular Falcon's hull in several places; these were removed to make the Eagle seem sleeker.
Several sets of vents/indentations in the hull were filled in with Green Stuff.
I decided against including the notches in the leading edge of the wings (as seen on the Falcons).
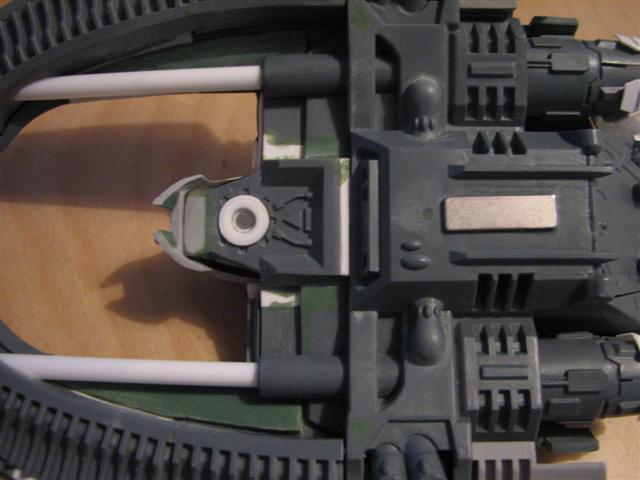
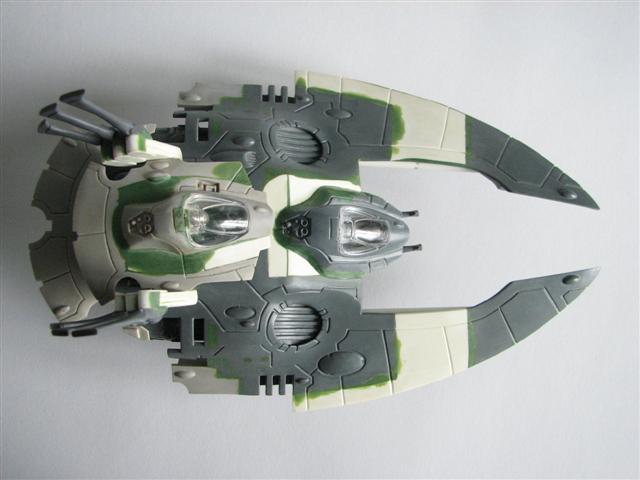
12. A dorsal view of the Eagle's hull. I wanted to make the vehicle more streamlined and less cluttered than the normal Falcon to highlight the fact that it serves a very different function, so several minor changes were made.
This cowling was made using plasticard and the top half of the cockpit from a Wave Serpent.
The front half of the cockpit, made from the Titan's "mask", can be removed and is held in place by magnets.
The angular corners of these plasticard sections were filed down to match the contours of the hull.
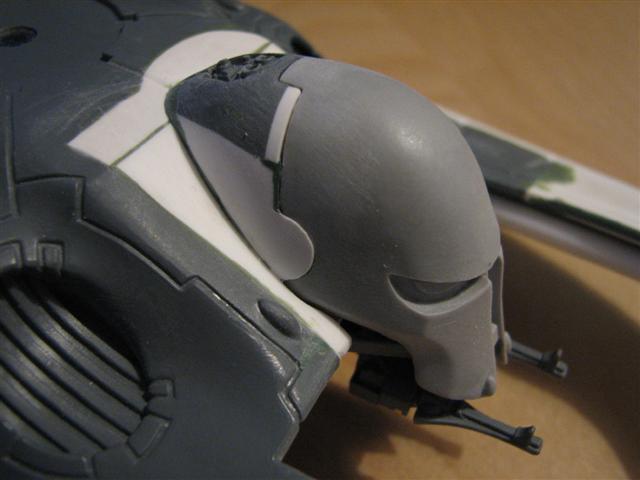
13. A detailed view of the cockpit and the cowling that sits behind it.
The magnetic weapon mount for the shuriken catapults was extended downwards slightly so that the weapons sit properly underneath the cockpit.
These parts were taken from the Bright Lances that came with the Wave Serpent kit and were attached to the bottom of the vehicle for extra detail.
14. Another view of the underside of the vehicle.
The additional fins were extended using small pieces of thick plasticard.
These brass pins fit into holes on the main chassis and will provide additional support when the parts are glued together.
These lengthened pylons are made from hollow styrene rods and slide over narrower ones connected to the main hull.
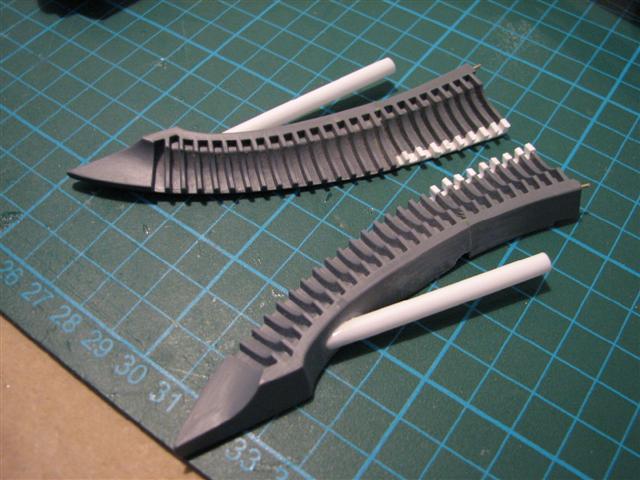
15. The extended sections of fins, nearing completion.

16. The underside of the upper hull continues to take shape. Normally most of this wouldn't be seen, however since it is removable on the Eagle I wanted to make it look neat and disguise the conversion work as much as possible.
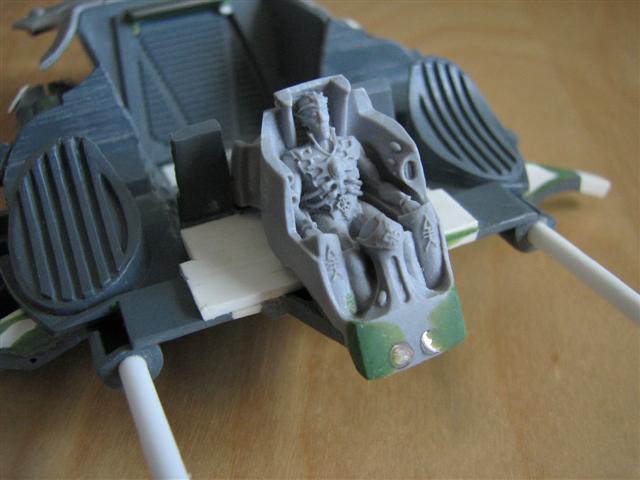
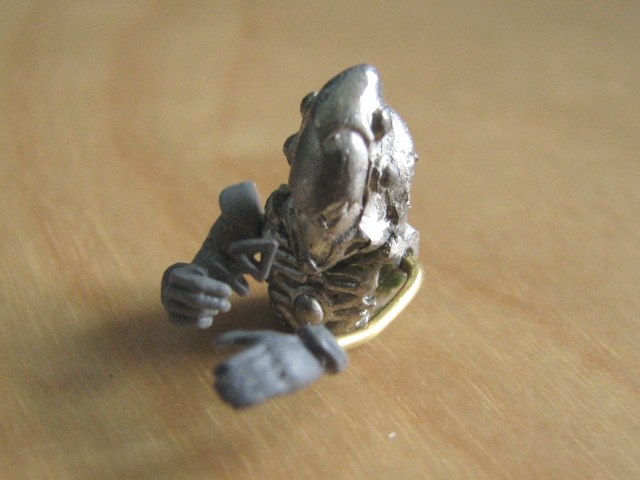
17. A close-up view of the Revenant Titan pilot and cockpit that I used in the Eagle's construction.
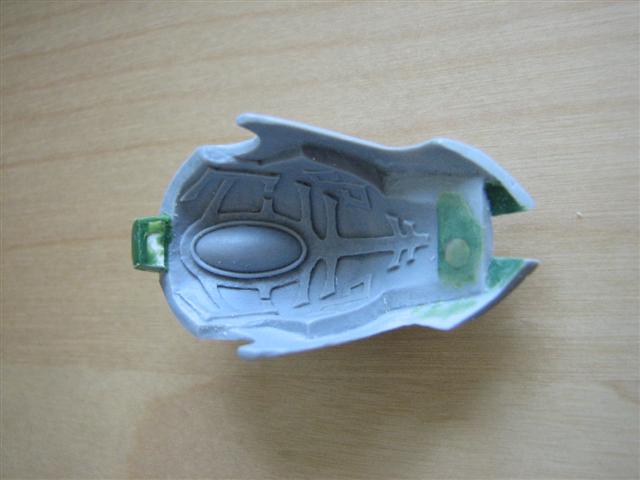
18. The inside of the Revenant Titan mask has some great detail - one of the reasons that I didn't want to just glue this piece onto the front of the vehicle.
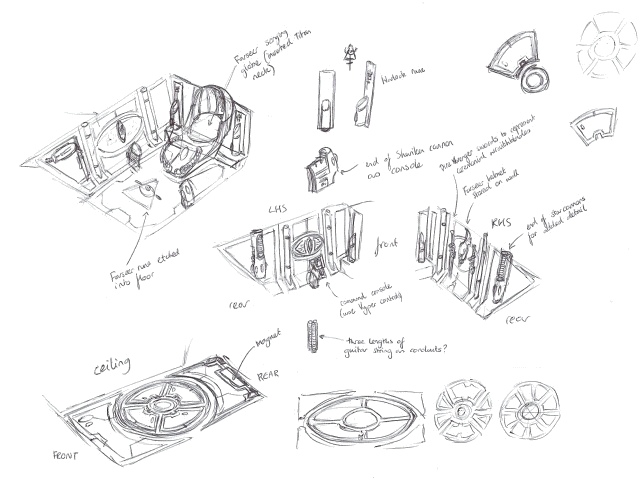
19. I drew some more concept sketches for the Eagle's interior. The room is dominated by the Farseer's "scrying globe" - a futuristic crystal ball that is used to try and predict the outcome of battles.
The scrying globe is actually made from the left-over neck joint of the Revenant Titan, turned upside down.
The walls in the front half of the hold were removed as they did not slope away at the same angle as the walls to the rear. I wanted continuous, unbroken walls to make the hold seem larger.
These thin styrene rods slide inside the supporting pylons for the wings and will make the finished model more sturdy.
The floor in the standard Falcon model is ridged - I replaced this with a smooth floor that is more in keeping with the streamlined Eldar design aesthetic.
The seats were cut away to provide more room.
20. The hold begins to take shape. Basically all of the existing interior was removed to provide a blank slate. My main goal was to create the illusion of more space so that once all of the detail and fixtures were added it wouldn't seem too cramped inside.
This arm was taken from the High Elf Archer kit.
This rune came from a Dire Avenger shuriken catapult.
The Warlock's outstretched hand was originally part of a Dire Avenger Exarch's shimmershield arm.
The head was cut away from the body and repositioned slightly lower so that the torso would fit into the cockpit of the turret.
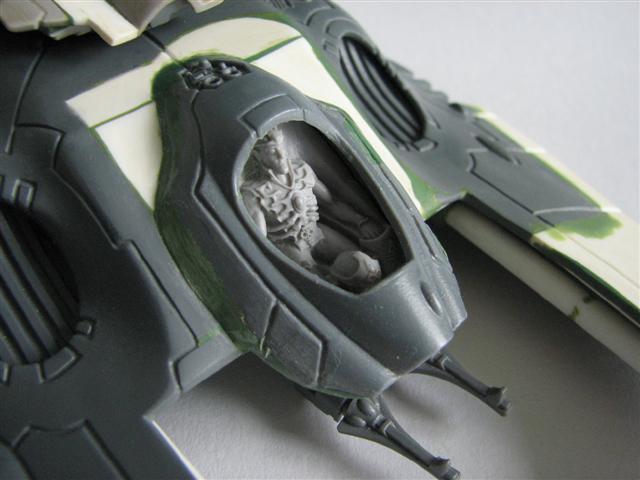
21. The Warlock crewman takes shape. Since Eldar psykers use runes to channel their powers I modelled him holding one and extending his other hand to cast a power.
The cockpit was sunk lower into the turret to accommodate the taller helmet of the Warlock crewman.
Green Stuff was used to model robed legs for the Warlock crewman.
22. The turret, now nearly complete.
I used Green Stuff to hide the join between the resin and plastic components.
Plasticard filled in the gaps created by realigning the cockpit centrally.
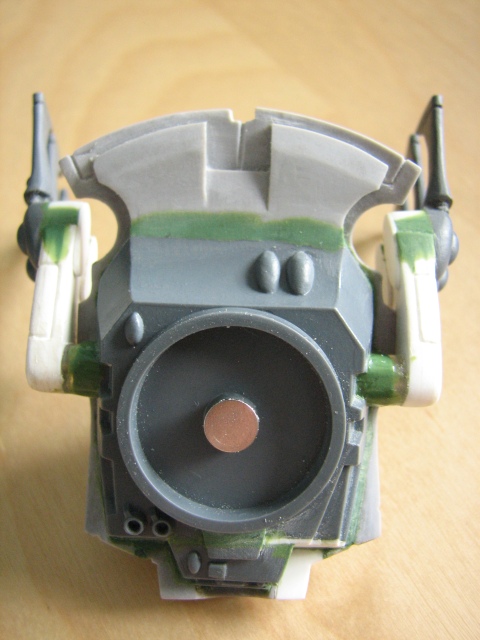
23. The underside of the turret.
24. An updated work-in-progress mock-up of the Eagle.
Two small round magnets were glued to the turret and concealed with Green Stuff.
One edge of the transparent canopy was cut away and three 1mm cubic neodymium magnets were glued in place and masked with Green Stuff.
25. The canopy covering the cockpit of the Eagle's turret has been magnetised so that it can be completely removed to see the crewman inside more clearly.
26. A mock-up of the interior.
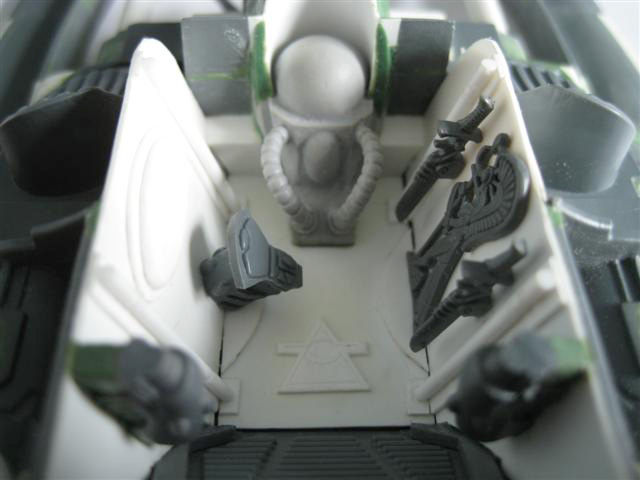
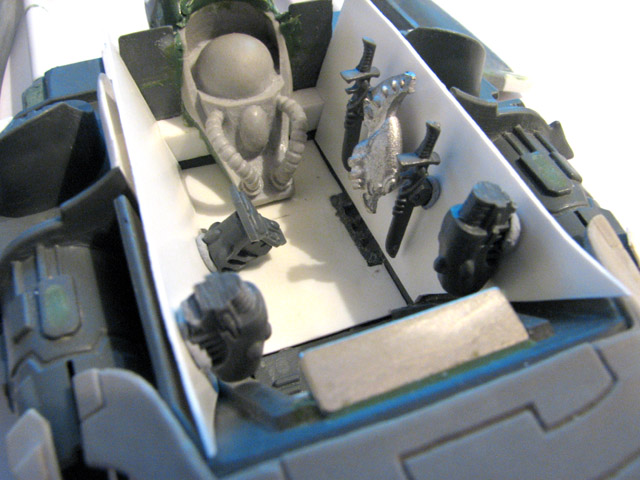
27. The completed interior.
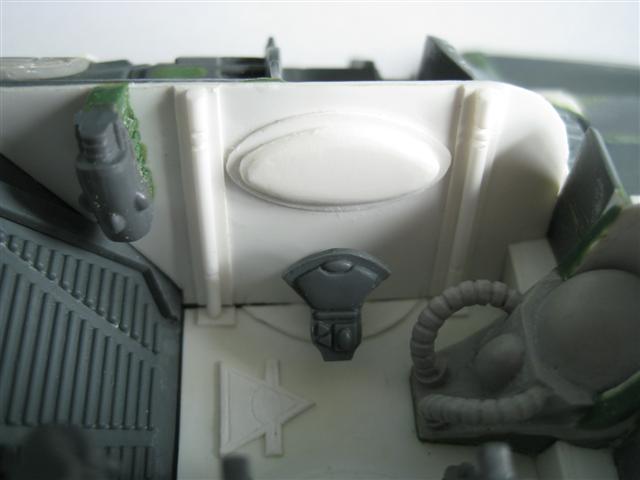
28. A close-up of the left-hand side of the interior.
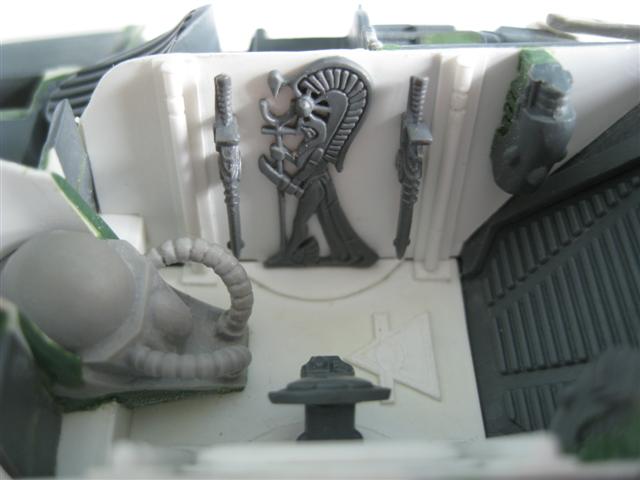
29. The right-hand side of the Eagle interior.

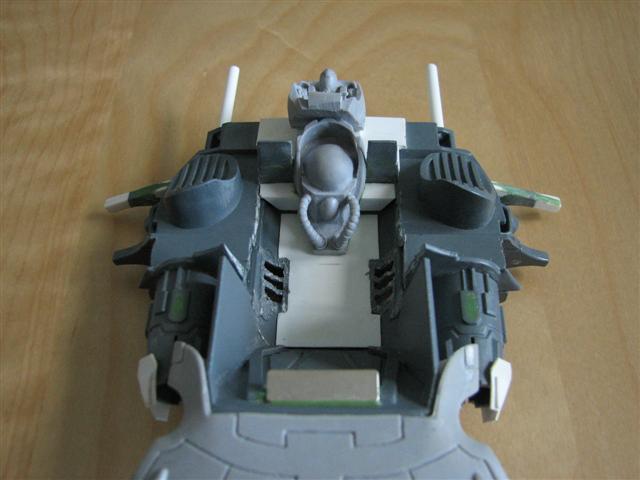
30. The front of the Eagle, with the upper hull removed.
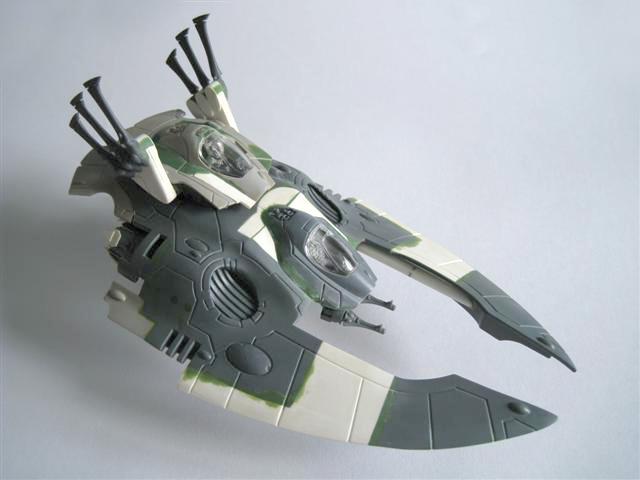
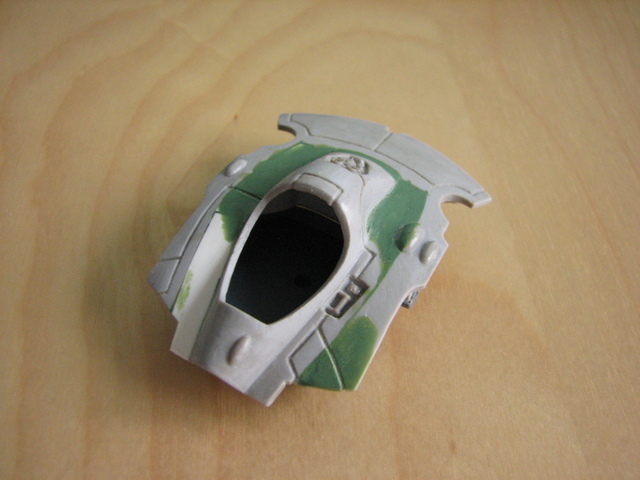
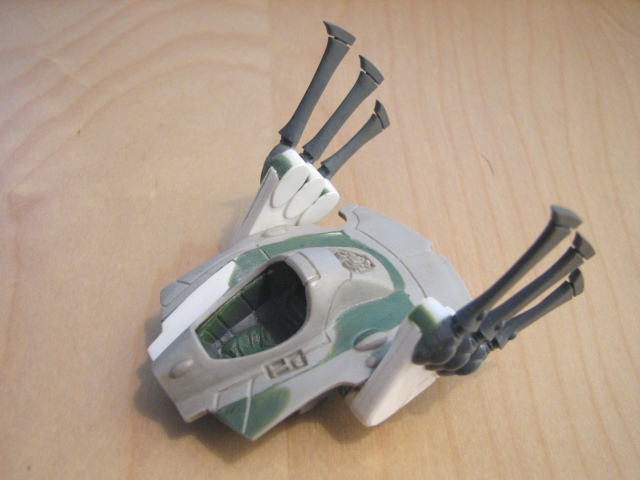
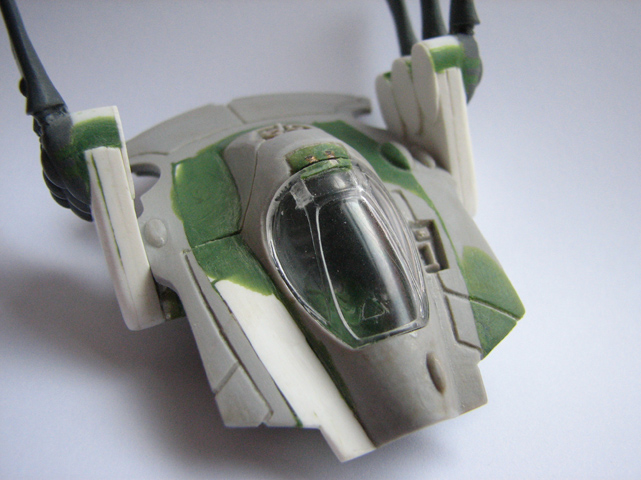
31. I eventually made the difficult decision to replace the Titan mask with a more standard cockpit front, wanting the Eagle to look more streamlined. The Titan mask, whilst an interesting feature, was too bulbous and made the Eagle look too much like a Cylon Raider (from Battlestar Galactica) for my liking. The Revenant Titan pilot remains and is clearly visible through the transparent canopy.
32. The new cockpit with the Revenant Titan pilot visible.
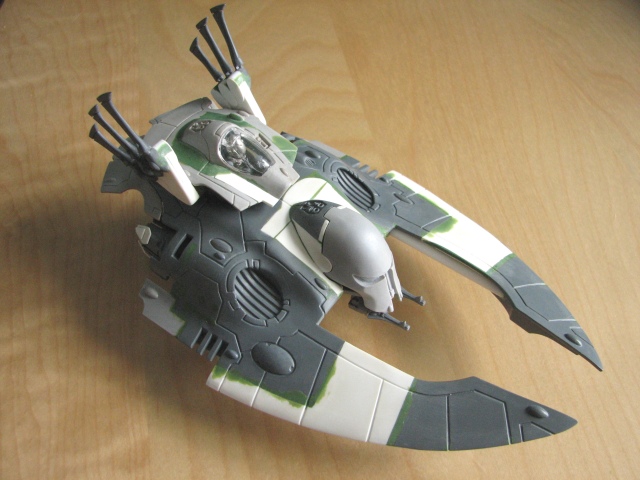
33. A dorsal view of the Eagle with the new cockpit.
comments powered by Disqus