Eldar Wraithknight
I'm not a fan of the Wraithknight's design. I've had problems with its proportions since the first scans leaked online and the benefit of proper photography and multiple angles hasn't drastically changed my opinion of it. After pondering how to improve it for some time, I came up with a concept that I was happy with that addresses most of the major issues that I have with the design. What bothers me most are these design elements:- The breadth of the shoulders
- The jump engines underneath the armpits/lower chest
- The stubbiness of the head
- The large, blank area on the chest
- The additional connecting rods from the inner thighs to the pelvis
- The variety of disparate designs that make up the warp vanes
- The thin hoops around the arm-mounted weapons
- The piecemeal design of the enormous ghostglaive
Date: 2013 - present (work-in-progress)
Components: Parts from 2x Eldar Wraithknight kits, brass rod, plasticard (various thickness), neodymium magnets (various sizes), 1x classic metal Fire Prism sensor, 1x Revenant Titan pilot, 2x Wraithlord warp vanes, 1x large oval base
Related:
1. This image, from the excellent Iyanden codex supplement, was the basis for my concept.
Original artwork © Games Workshop.
Original artwork © Games Workshop.
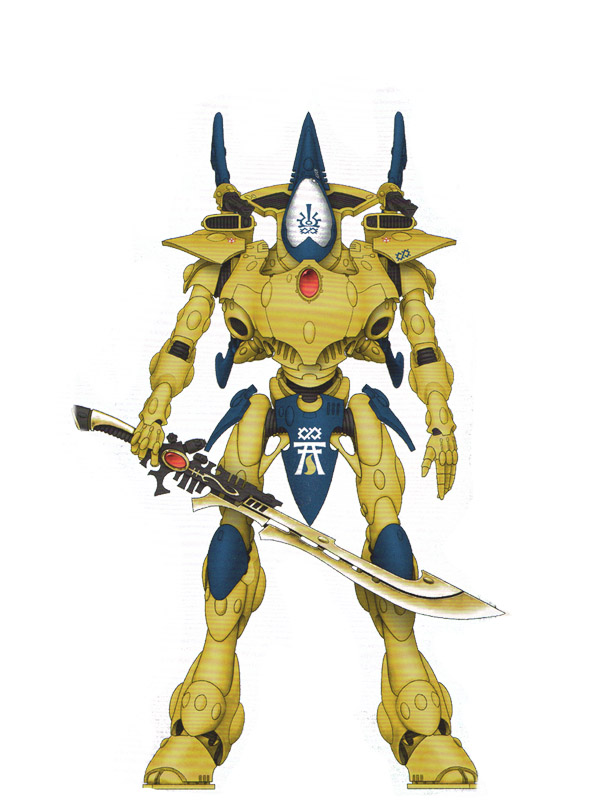
2. Using Photoshop, I created this concept design for my Wraithknight conversion. This blends design elements from the Revenant, Phantom (the Wraithcannons will be underneath the forearms) and Wraithlord without (hopefully) looking too much like any one of them. The four sets of warp vanes will all follow a design in the Eldar codex, with the two sets on the back being larger. This concept is obviously lacking the jump engines - I may incorporate something between the warp vanes on the back, or around the ankles (similar to the Revenant). I've moved the spirit seal to the front of the miniature to add detail to the blank chest and tie the design in with the Wraithguard - they don't have soulstones, but a single small spirit seal in the same position.
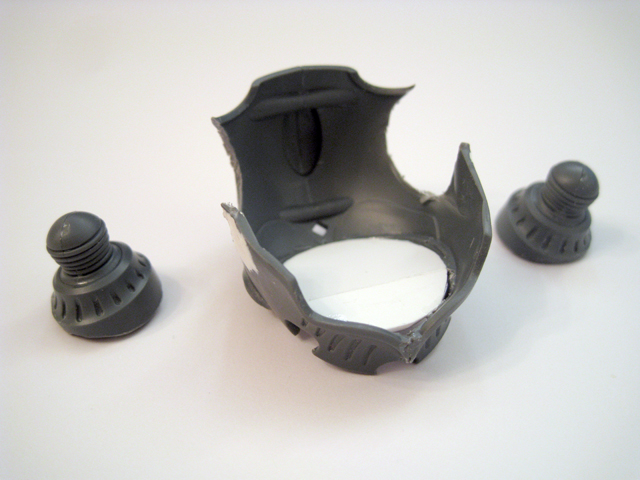
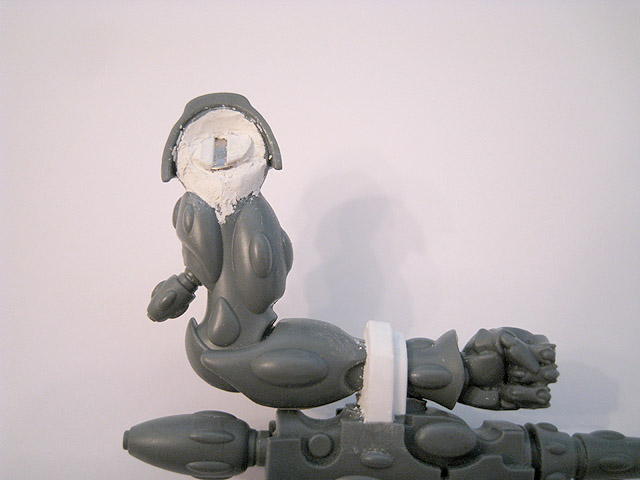
3. A work-in-progress shot of the converted head. The length has been increased using plasticard and the shape has been changed using White Milliput.
4. The underside of the head.
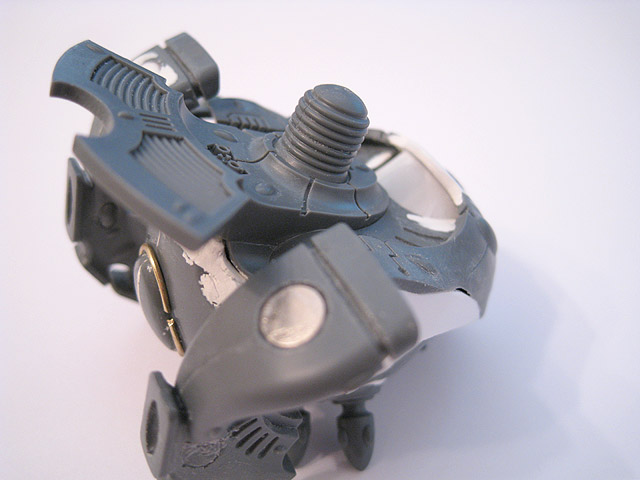
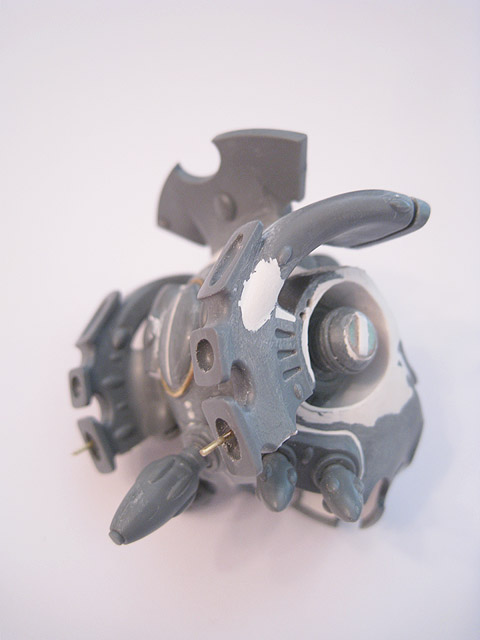
5. I removed the ball joints for the shoulders from the torso. This was so that they could be repositioned closer together, reducing the width of the shoulders and bringing the Wraithknight's arms in closer to the body.
6. The underside of the torso. Rather than using the domed socket for the waist, I fitted flat sections of plasticard to increase the amount of space available inside the chest cavity for the other modifications.
7. The torso takes shape.
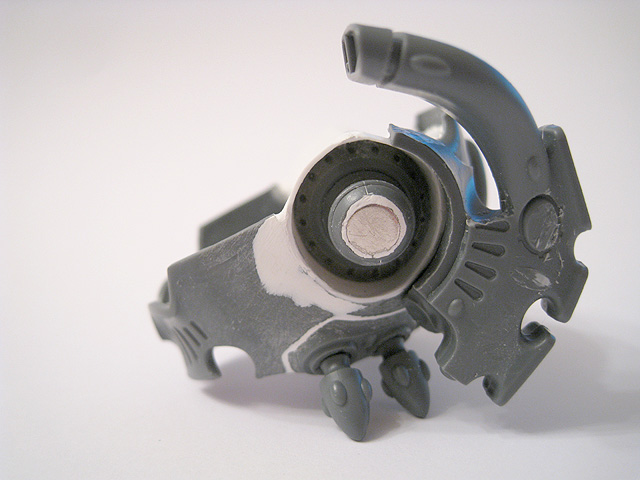
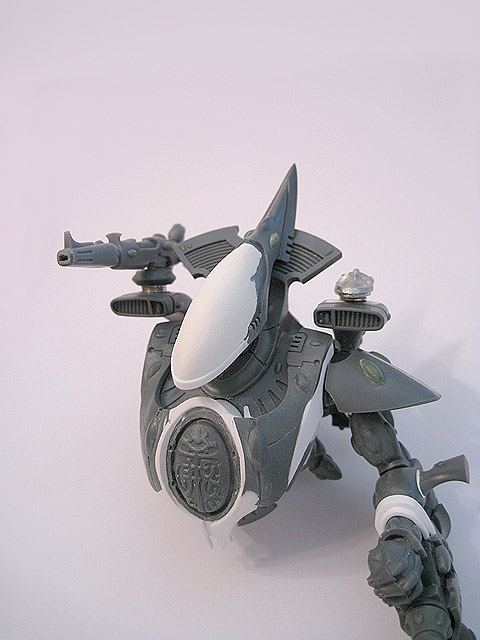
8. From this view you can see the recessed shoulder joints. I have also decided to retain the over-the-shoulder weapon mounts for the secondary weapons.
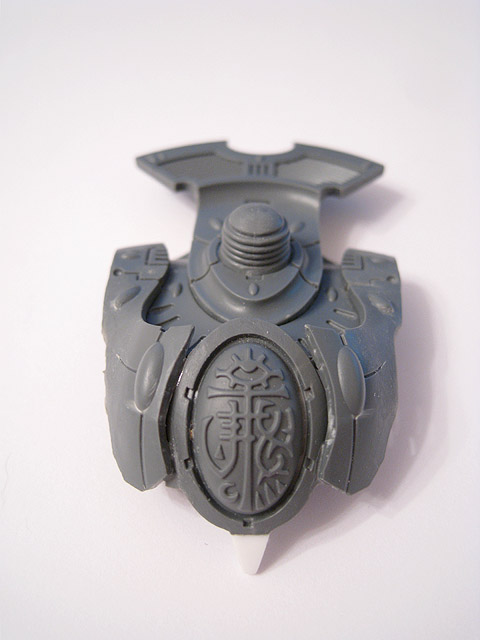
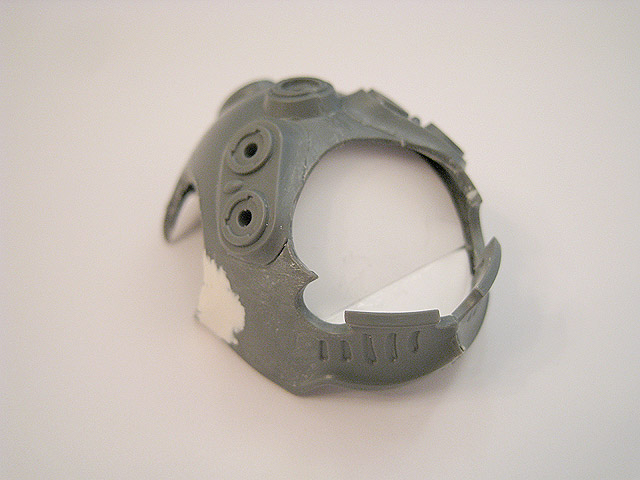
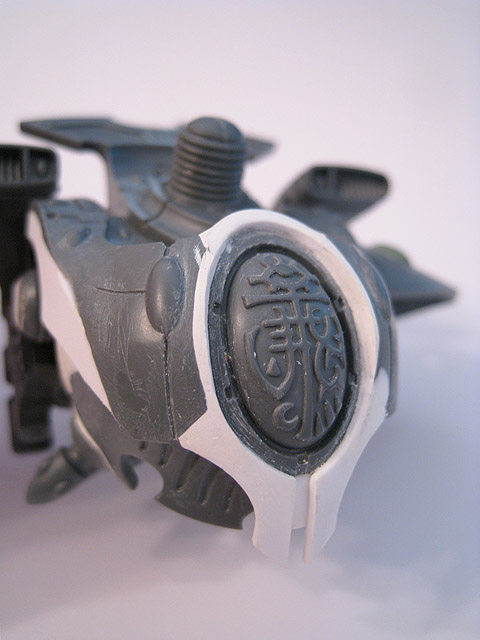
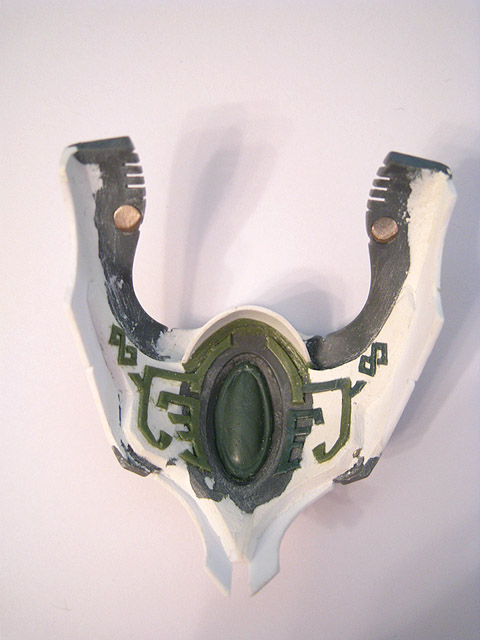
9. The modified breastplate, incorporating the large spirit seal from the back of the Wraithknight. This is a really striking design element and it seemed wasted buried on the back of the model. The extra detail also adds a much-needed focal point on the front of the model and breaks up the blank chest.
10. The torso continues to take shape.
The top edges have been cut down to give these pieces a distinct outline.
I removed the gem and sanded down this area.
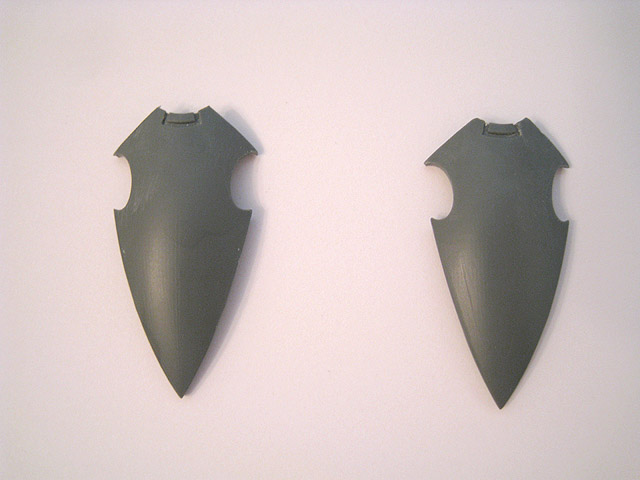
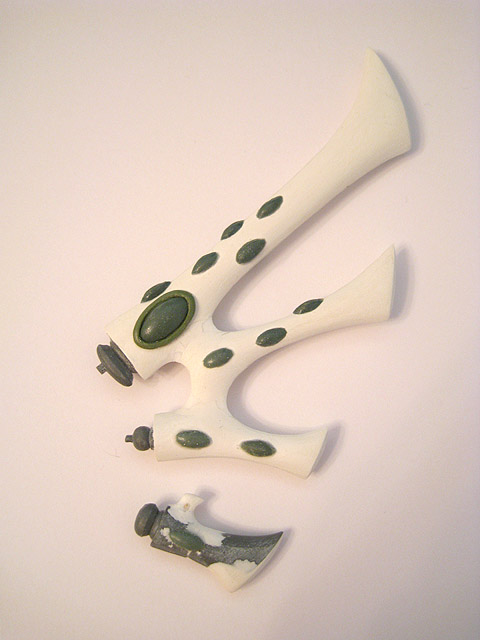
11. These shield-shaped pieces (normally attached over the groin of the model) have been repurposed as oversized tassets and will instead sit on the hips.
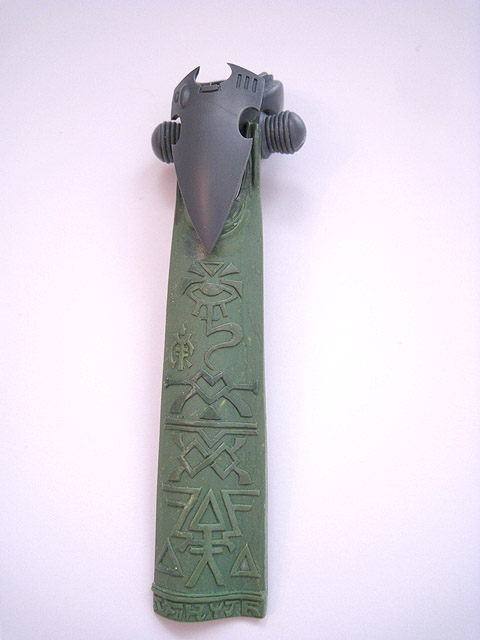
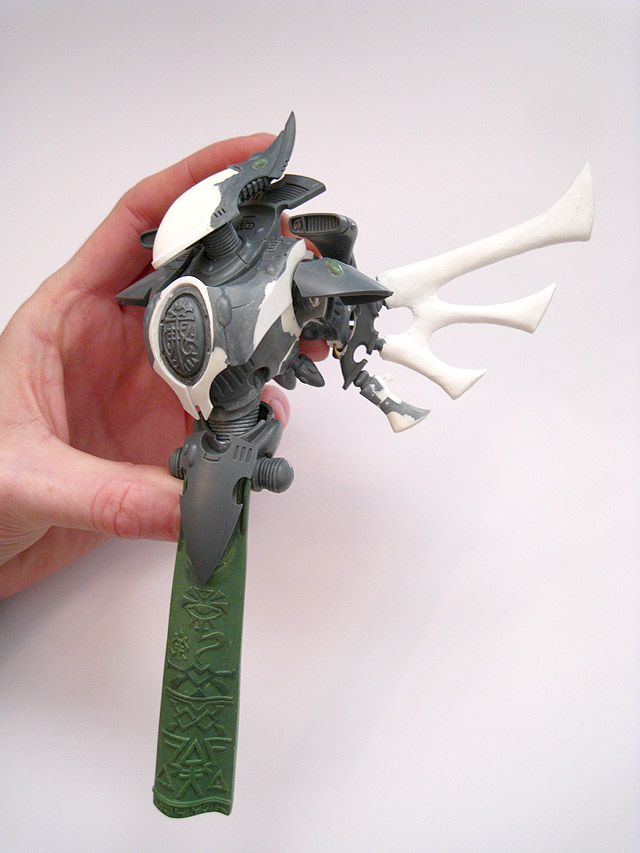
The barrel was cut down to a more sensible length.
This fluted section was removed from behind the muzzle and reused to complete the nozzle. This also makes it look more like a Wraithcannon.
With the weapon relocated underneath the forearm, I've added this arm blade in its place.
The weapon is underslung similar to the Phantom Titan. I feel that this helps to further narrow the breadth of the miniature and make it seem more streamlined and less bulky.
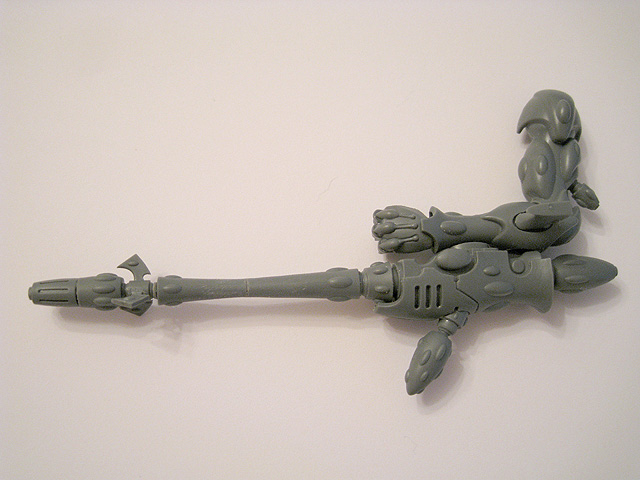
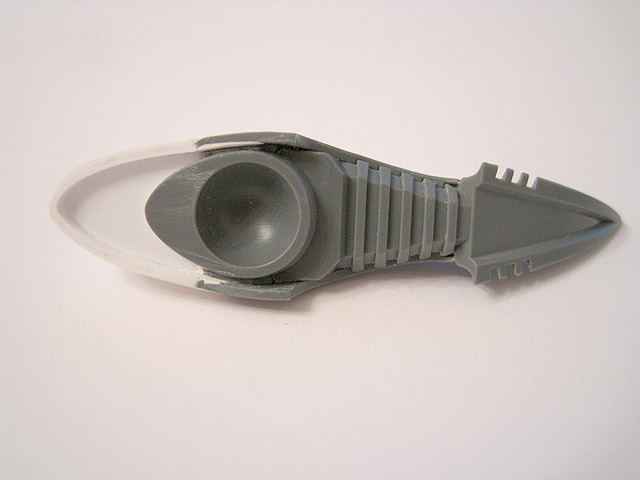
12. One of the arms takes shape. The Heavy Wraithcannon has been subtly converted to make it look more similar to the smaller Wraithcannons wielded by the Wraithguard.
13. The completed heavy wraithcannon arm. White Milliput has been used to fill in gaps and blend pieces together.
14. A close-up view of the arm. The heavy wraithcannon has been attached at the wrist. Although the Phantom Titan grasps its underslung weeapons using inverted pistol-grips, I wanted the Wraithknight to have its hands free and figure that the weapons would be fired by psychic commands from the pilot.
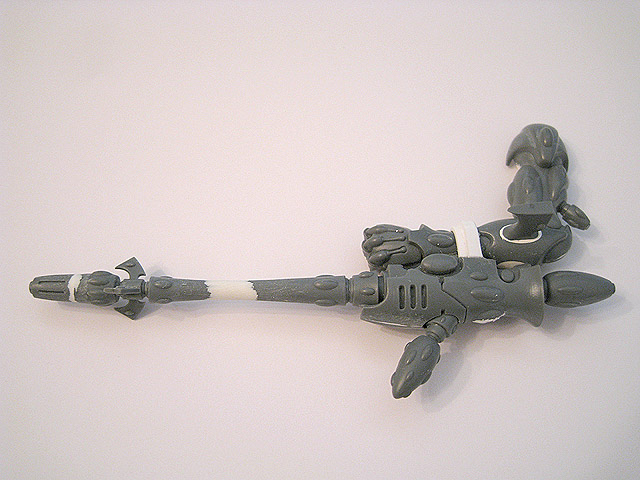
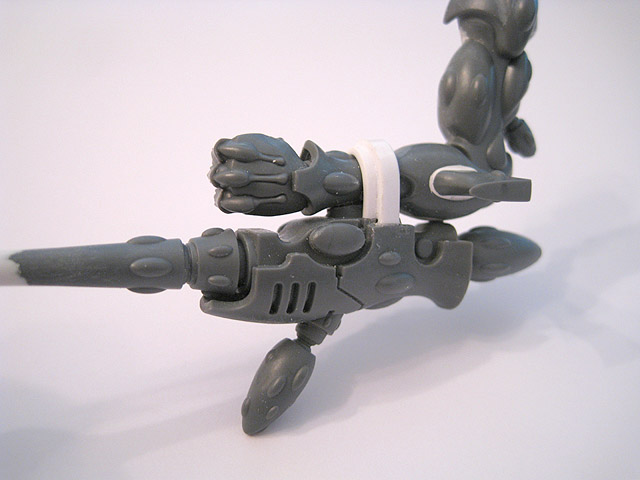
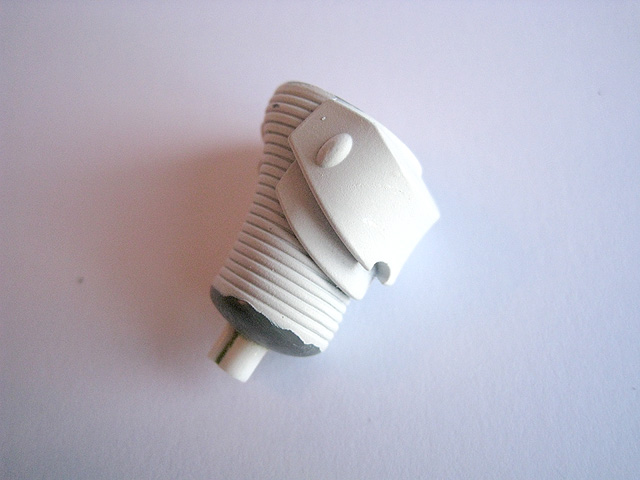
15. Each arm has been magnetised so that they can be swapped out.
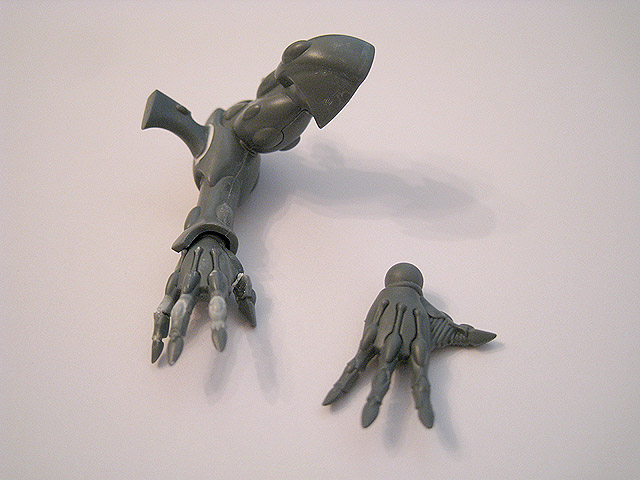
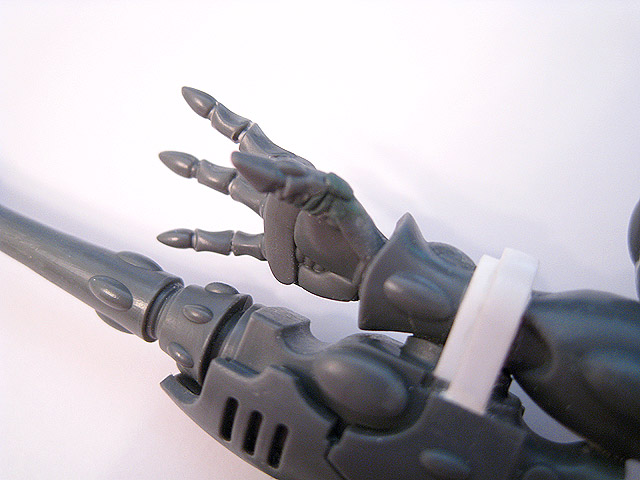
16. The outstretched hand supplied with the Wraithknight kit looks totally bizarre. The fingers are hyper-extended and the thumb bent at an unnatural angle, with a fat section of ribbing joining it to the hand. For my conversion, I bent the fingers into more natural positions and reattached the thumb, with much of the ribbed area cut away.
This short strip of plasticard fits into a matching recess on the magnet attached to the arm. This prevents the arm from rotating under its own weight.
Shaped pieces of plasticard have been used to complete the cut-down breastplate.
17. An updated side view of the torso.
18. A close-up of the converted breastplate, which is nearly complete.
19. The back of the Wraithknight takes shape.
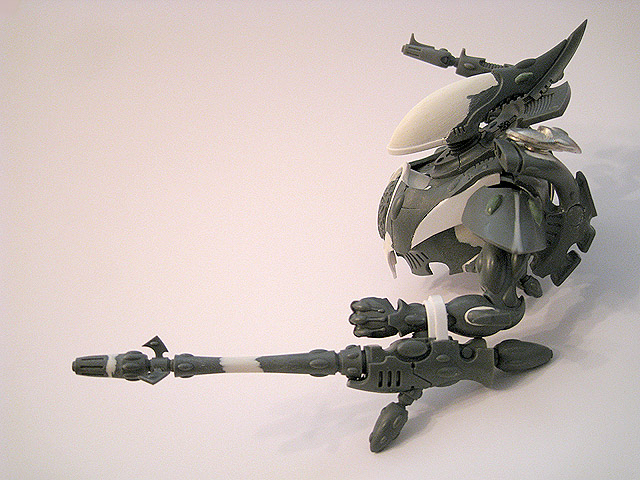
20. An over-the-shoulder view of the torso.
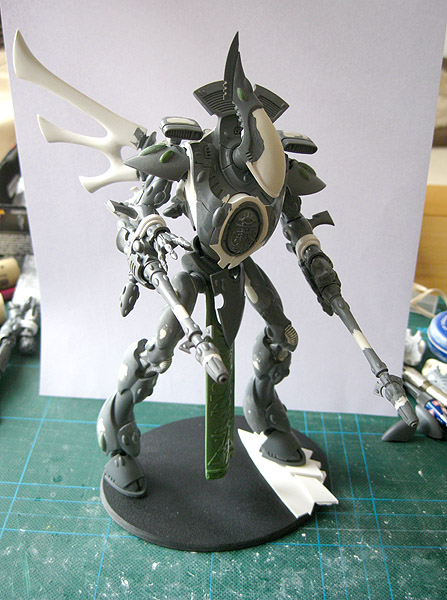
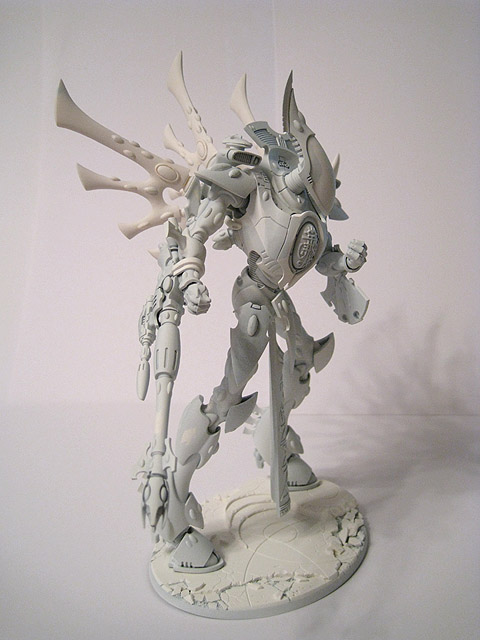
21. The magnetised secondary weapon mounts are completely removable and compatible with my existing range of magnetised heavy weapons, which also fit the Wraithlords and War Walkers.
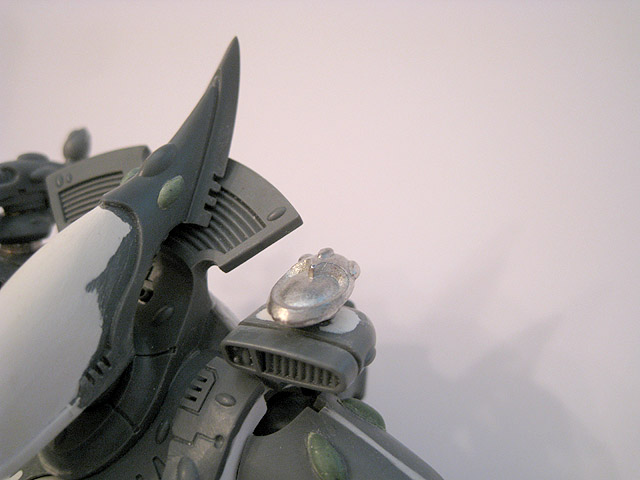
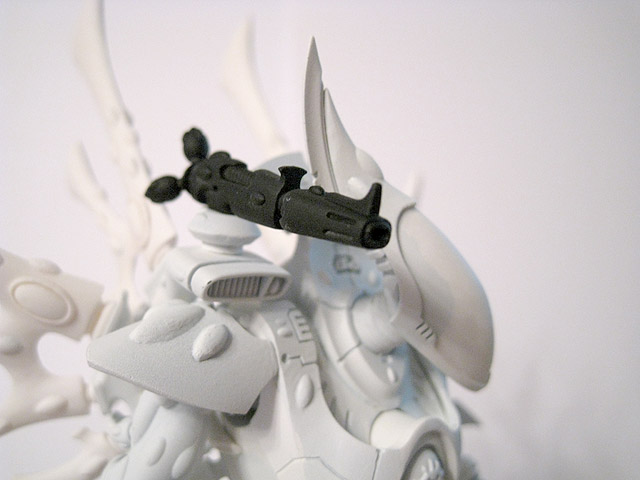
22. I made this optional (and completely pointless) sensor/targeter using a metal component from the classic Fire Prism. I use these on my updated Fire Prisms and I liked the idea of tying the Wraithknight's design into one of the Eldar's most formidable tanks.
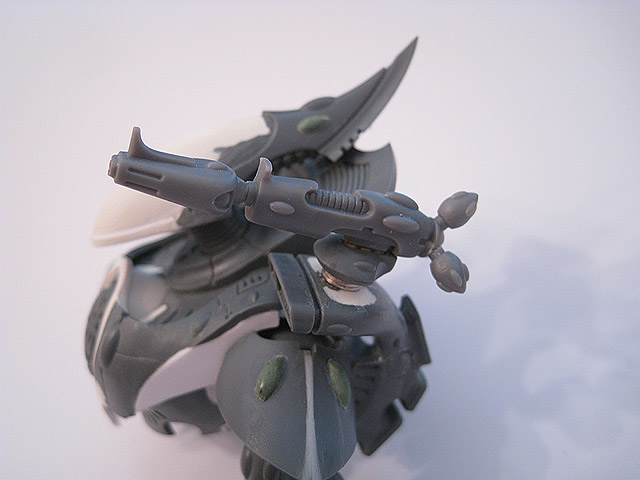
23. A side profile of the Wraithknight's torso, with one arm attached.
24. Alternative view of the torso as it takes shape.

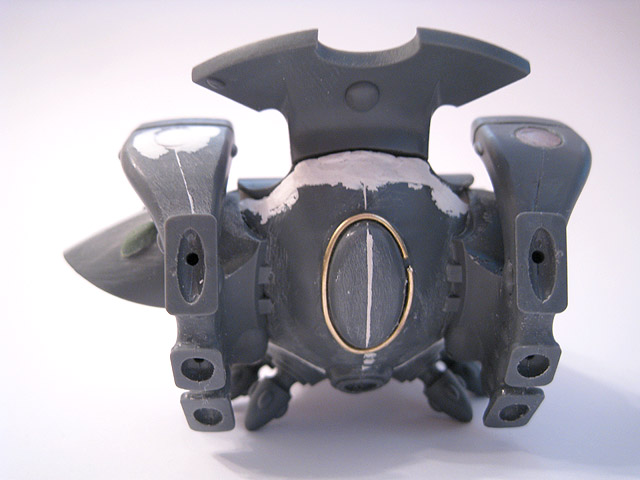
25. The upper thigh of the right leg. White Milliput has been used to fill in the area where the supporting struts from the pelvis would normally go.
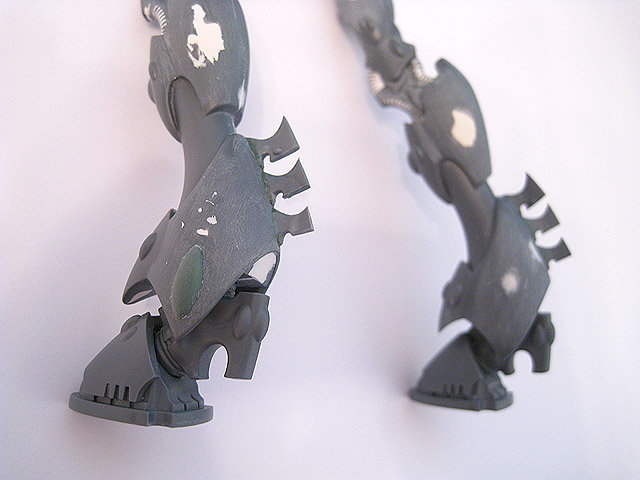
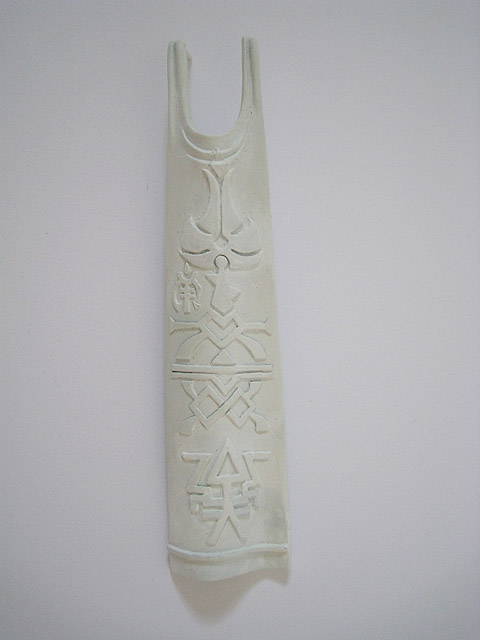
26. The three main components of the right leg. A lot of Milliput was used to fill in gaps and remove the ribbing on the multi-jointed knee (another odd design choice that I'm not keen on). I also removed several of the large bulbous areas around the ankle and below the knee. These shapes looked too big and too round and not in keeping with the Eldar design. Some will be replaced by smaller, more oval-shaped protrusions at a later stage.
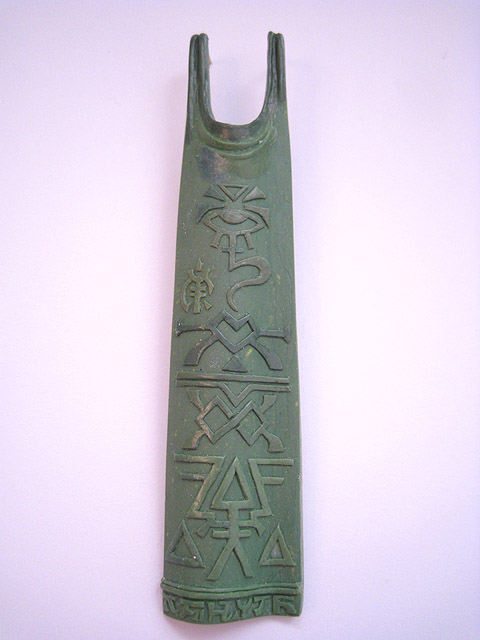
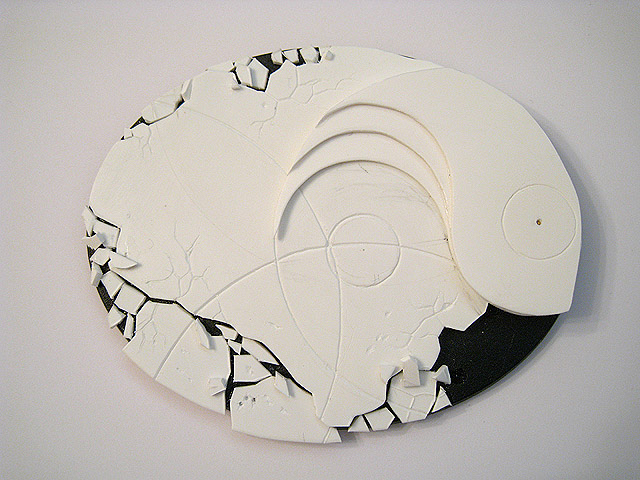
27. I scratchbuilt a decorative tabard using Green Stuff, with brass rods along the edges to give it rigidity. The runes include a stylised Wraithknight design, the Mymeara craftworld rune and a spirit seal design meaning "Valiant Warrior - Boldness and Sacrifice".
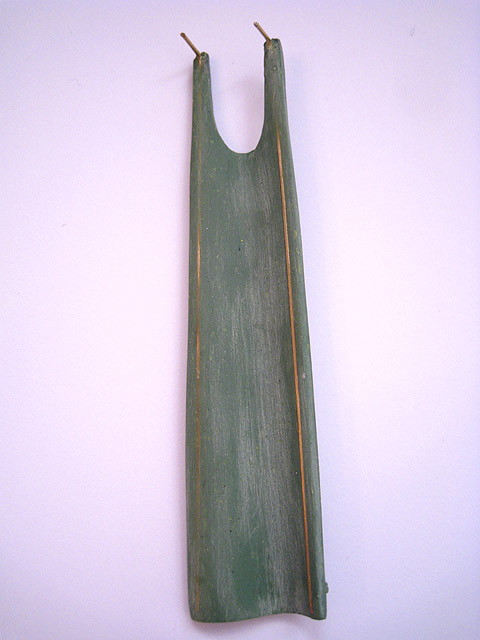
28. The brass rods were sunk into the Green Stuff when it was still pliable, and have been blended in with additional Green Stuff and sanding.
29. The hips of the Wraithknight, with the tabard in place.
30. A close-up of the hips.
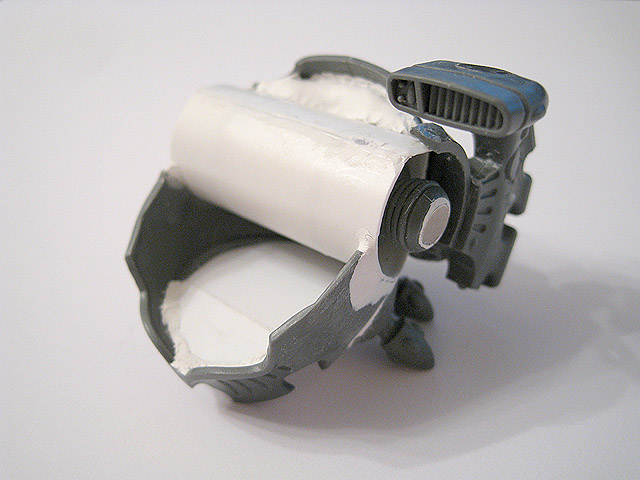
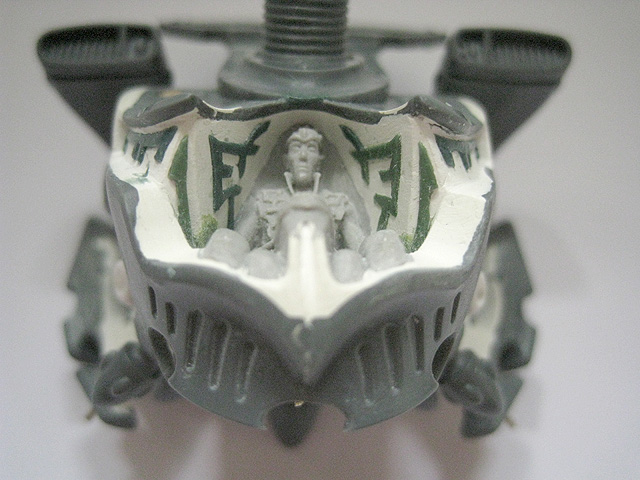
31. The most difficult feature of this conversion was to reshape the Wraithknight's breastplate, whilst allowing it to be removable. But why is it removable?
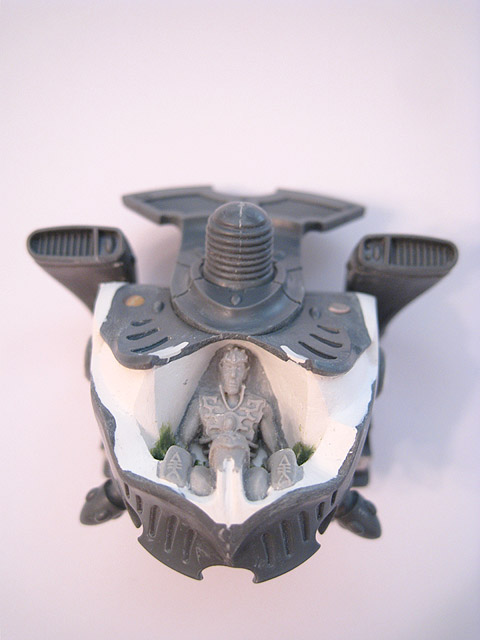
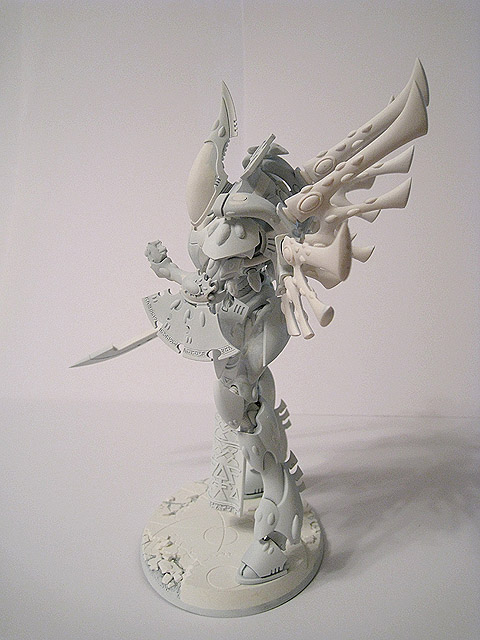
32. This is why the breastplate can be removed! Using a heavily modified component from a Revenant Titan, I have added a pilot to the Wraithknight. In the background for the Wraithknight, Jes Goodwin described the living pilot as being curled in a "foetal position in the chest". I tried to replicate that, but it didn't look right and would obscure a lot of the detail. So I decided to have the pilot sitting in a more conventional manner, though his knees have been angled upwards.
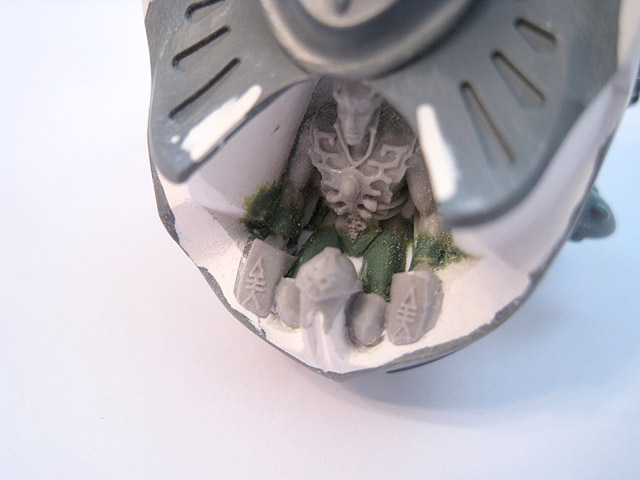
33. Another angle of the pilot, highlighting the Green Stuff sculpting used to cover the join. In order to fit the pilot into the chest, he had to be cut in half and the front half angled upwards. Even with this change, it was still a very tight fit.
34. The torso now has both sets of sockets for the rear-facing warp vanes.
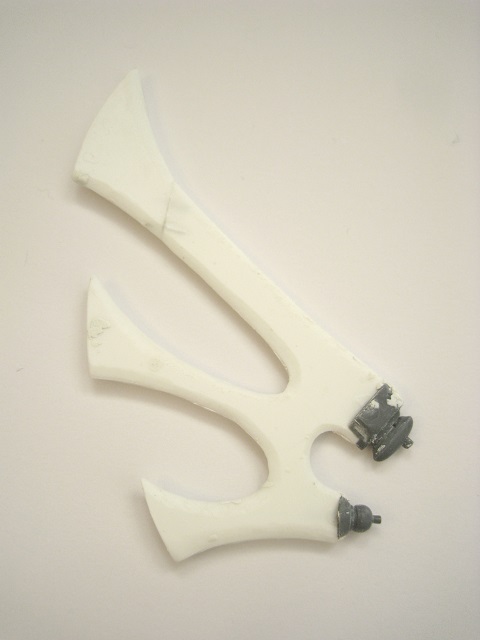
35. The warp vanes begin to take shape. There will be four identical sets of these for the Wraithknight.
36. A full set of four warp vanes. White Milliput has been added to the plasticard to give them a more rounded appearance. This will be sanded down and then gems and blisters will be added with Green Stuff.
Only three of the four scattershield blades have been used, making it more compact. They have also been rotated around and sit at a different position on the forearm.
This detailed section of the scattershield was cut away and repositioned so that the gem runs parallel to the forearm.

37. My converted scattershield arm.
Plasticard was used to fill in this stepped section of the blade.
Small gems on the blade were filed down to give it a smoother surface.
A protrusion was removed from this section and the blade altered so that it appears to be one continuous piece, rather than segmented.
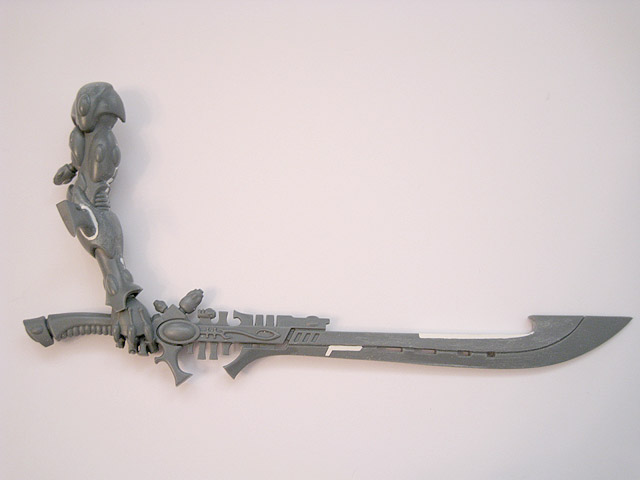
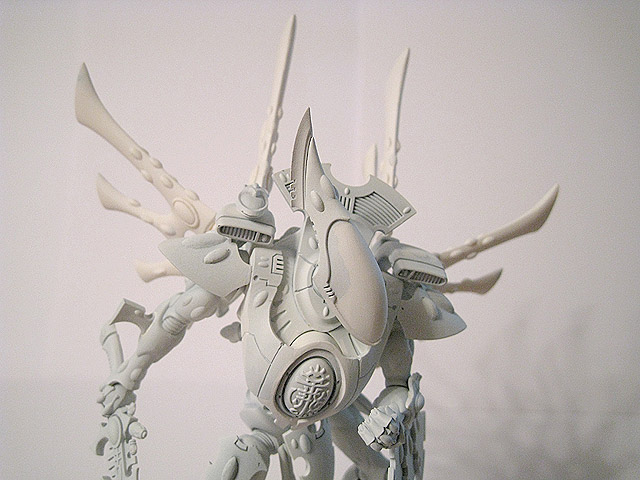
38. The ghostglaive has been subtly converted and I'm much happier with how it looks now.
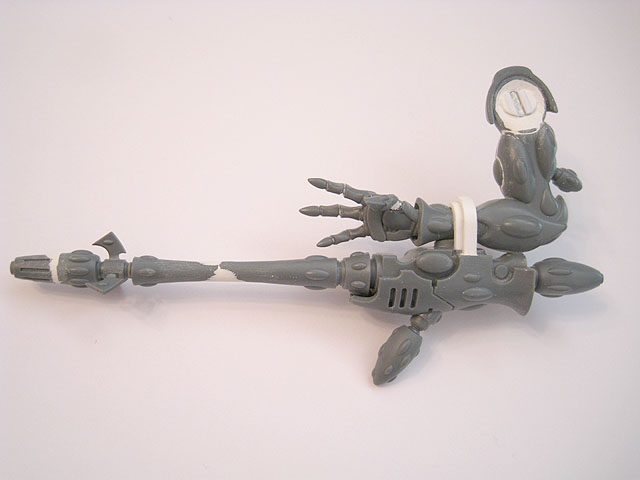
39. The right wraithcannon arm. This uses a converted open hand.
The arm is actually a left arm, with the shoulder joint spun around. I wanted to use this arm as it has a different bend at the elbow from the outstretched right arm that comes with the kit.
These three canisters were moved to the back of the suncannon, mimicking the configuration of the less-powerful starcannon.
The targeter was attached to the underside of the suncannon, similar to a pulse laser or pulsar.
The barrel was shortened considerably.
The prongs around the muzzle were cut down.

40. The suncannon has been significantly altered from the original design.
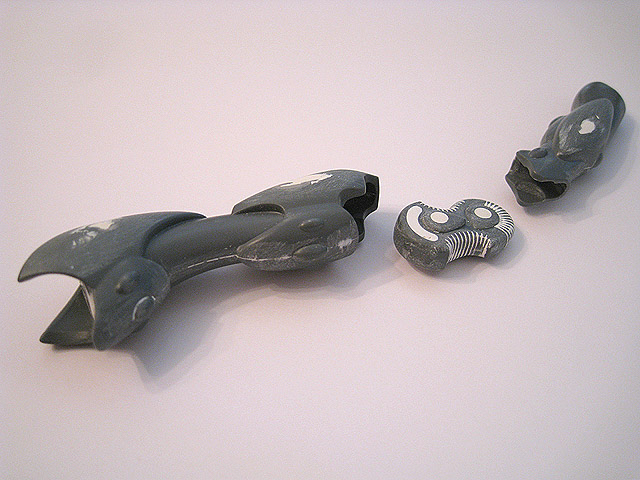
41. A work-in-progress mock-up of the Wraithknight. The warp vanes show the positioning of the additional third and fourth sets that will sit behind the shoulders.
42. The Wraithknight can now be assembled, so I'm getting an idea of how it will look when it's finished. I'm delighted with the pose; it's not particularly dynamic, but it is imposing and threatening. It also works with all of the arm combinations and it makes a change to see a Wraithknight with its left leg forwards and its body turned to its left (as the standard model faces to the right with its right leg bent at the knee).
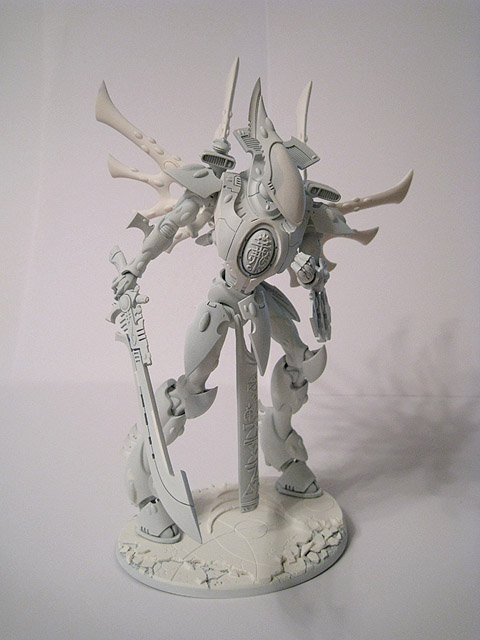
43. This mock-up includes one of the four sets of warp vanes, the shoulder pauldrons and the standard Wraithcannons.
44. I took inspiration from Jes Goodwin's original design sketch of the Wraithknight and added these small vanes to the back of the legs.
45. A close-up of the completed Green Stuff sculpting on the converted hand.
46. The inside of the removable breastplate. The large gem sits underneath the spirit seal and contains the spirit of the deceased twin sibling of the pilot.
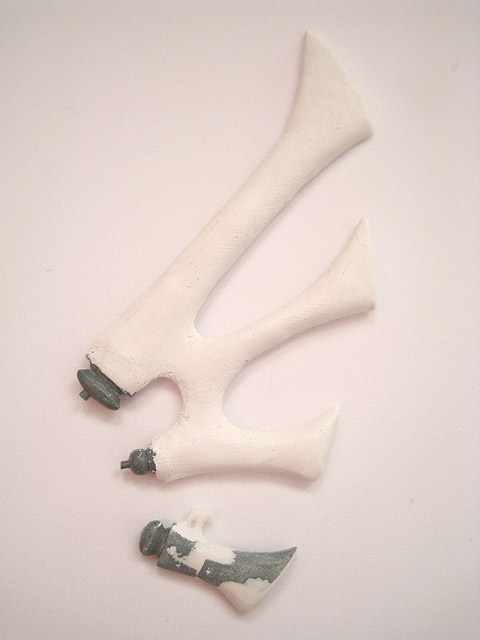
47. The completed master for the warp vanes. These will be cast in resin to give a full set of four.
48. A work-in-progress shot of the scenic base for the Wraithknight. The yin-yang symbol features a raised section incorporating a set of spiralling steps.
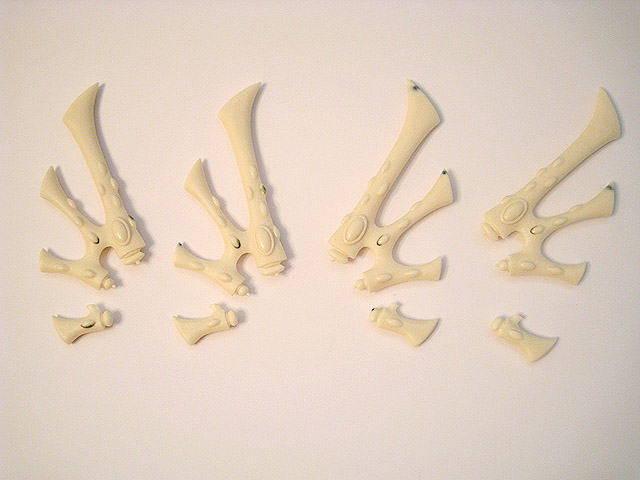
49. The complete set of warp vanes. These have been cast in resin and with the exception of some very minor imperfections, they are excellent reproductions of the original master that I scratchbuilt.

50. The scenic base is virtually complete at this point, with lots of cracks, chips, fragments and the odd bullet hole added to the ruins.
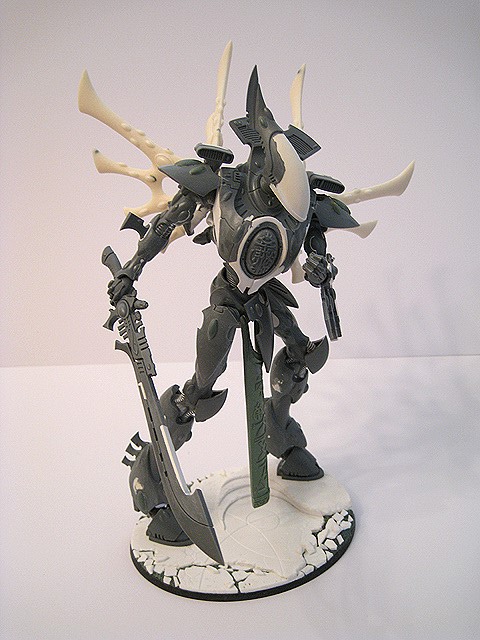
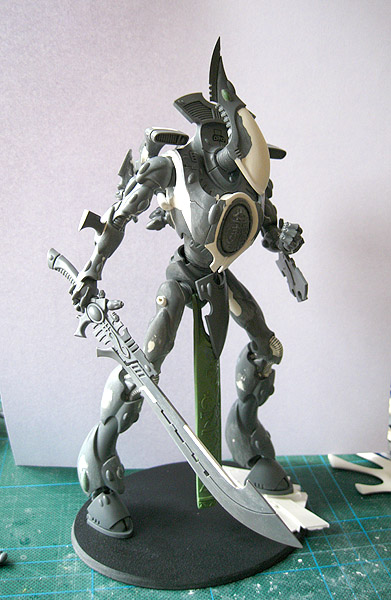
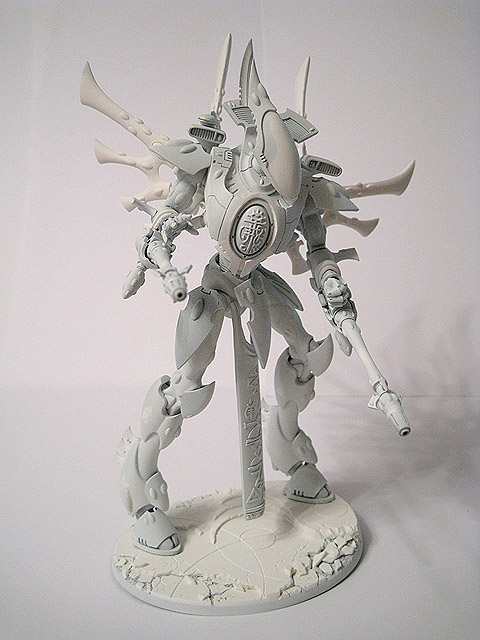
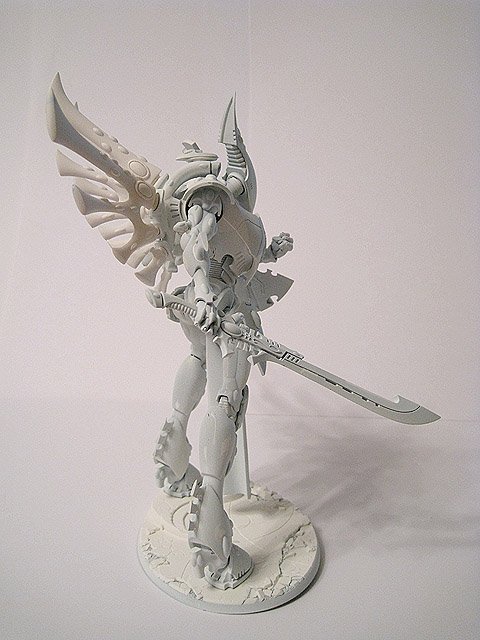
51. A mock-up of the Wraithknight conversion, fully assembled.

52. A close-up of the torso, with the four sets of resin warp vanes in place.
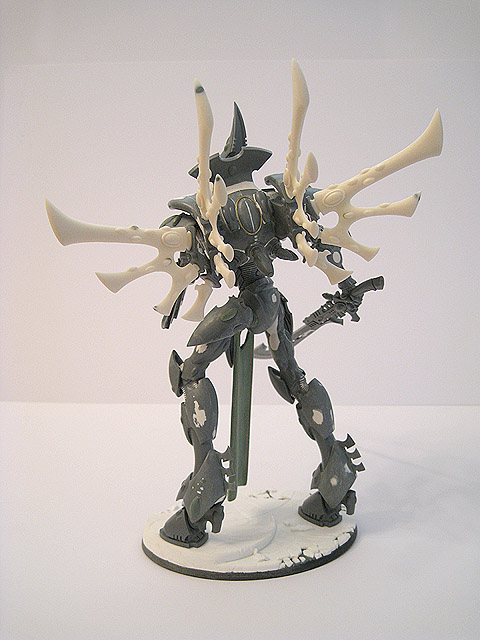
53. A view of the conversion from the back.
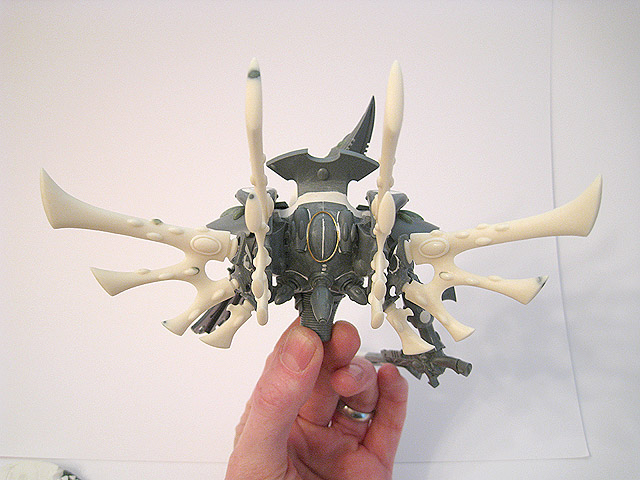
54. The Wraithknight's back, with the custom warp vanes.
The shoulder pauldrons are now attached to the removable breastplate.
I filed down the gems on either side of the spirit seal and etched connecting panel lines
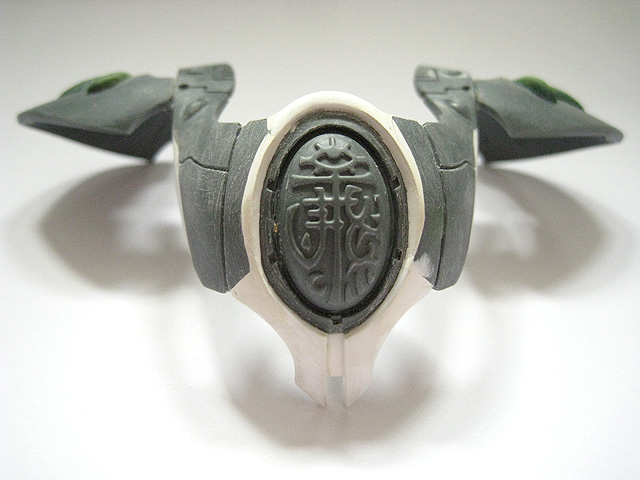
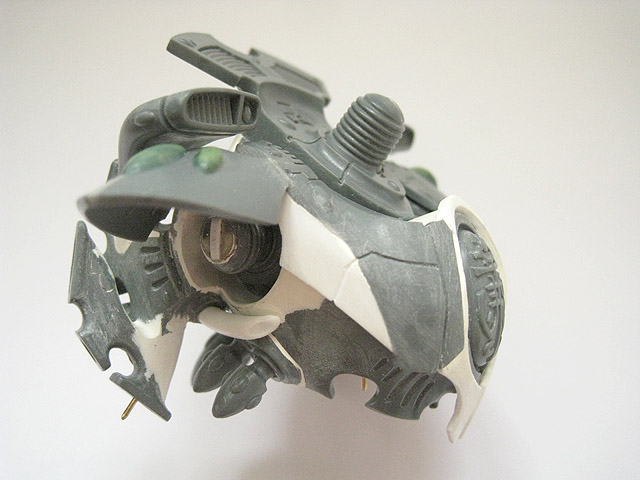
55. The removable breastplate was modified slightly.

56. A close-up of the completed detailing on the reverse of the breastplate.
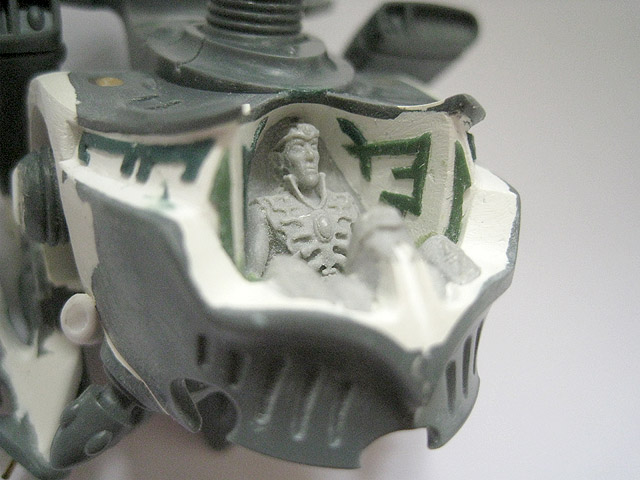
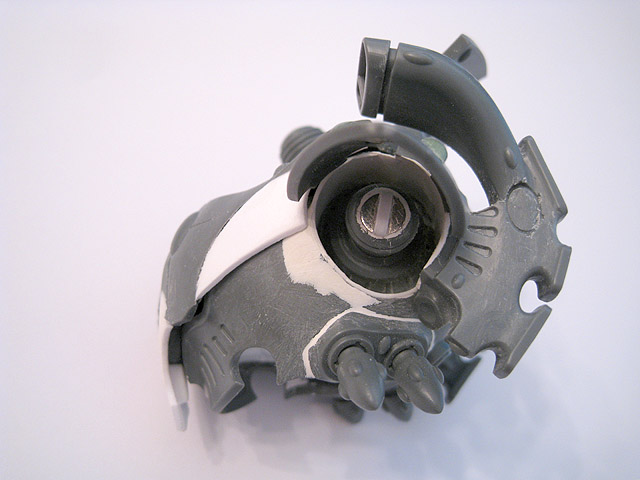
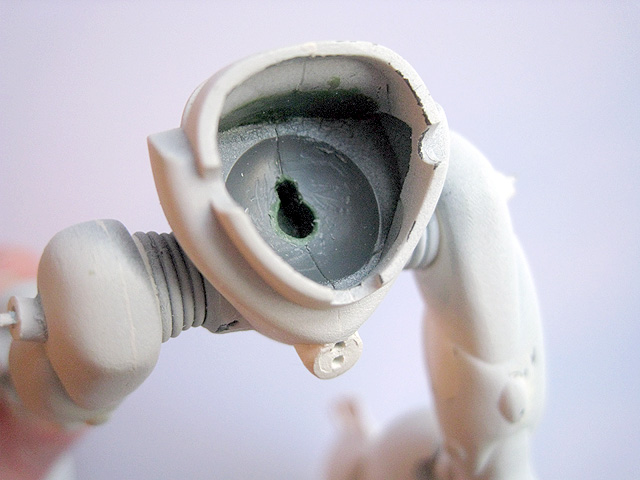
57. I added some detail to the cockpit using Green Stuff.
58. Another angle of the completed cockpit.
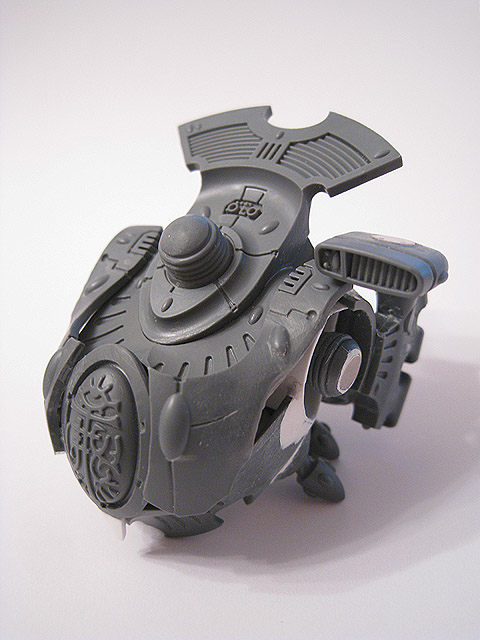
59. A close-up of the completed torso - the project is now ready for undercoating.
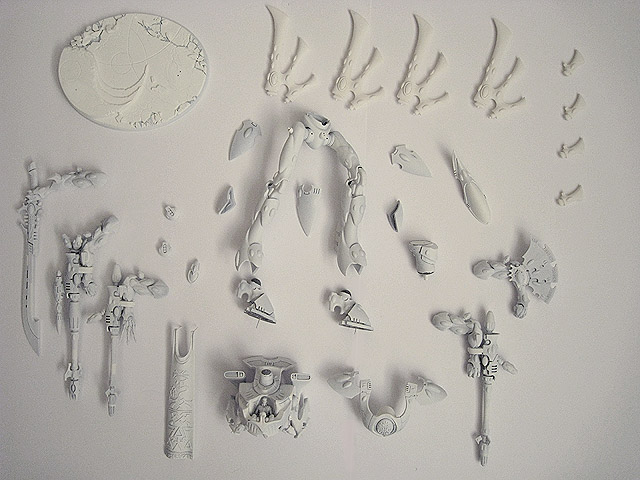
60. The Wraithknight has now been undercoated and is ready to be painted. I have deliberately separated it into 30 components to make painting it easier (and some of these parts are magnetised anyway so they can be swapped around). Some areas were masked off with tape or blu-tac so that the bare plastic is left exposed. This will enable me to still use polystyrene cement to glue the plastic parts together, ensuring a strong bond but still allowing me to paint the parts individually.
61. A mock-up of the undercoated Wraithknight, armed with two wraithcannons. The various constituent components have been held in place with blu-tack (or magnets) for the purposes of these photos.
62. The Wraithknight with a suncannon and scattershield.
63. Another mock-up, this time with the ghostglaive and scattershield.
64. A close-up of the upper torso.
65. The magnetised secondary weapon mounts are removable and accept any of the existing War Walker / Wraithlord / Guardian heavy weapon platform weapons.
66. Alternate view of the conversion.
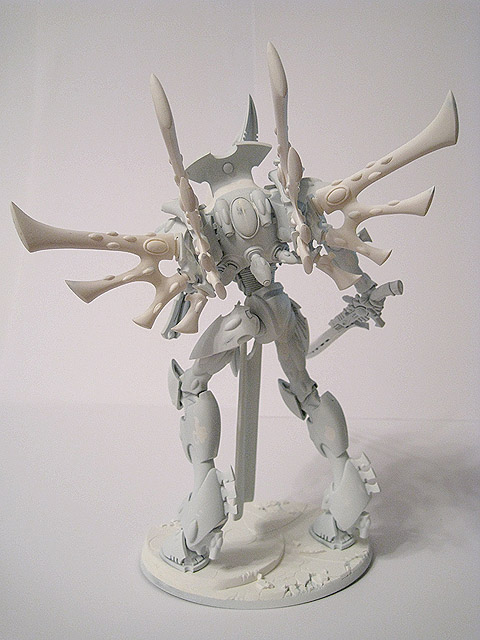
67. A rear view of the assembled and undercoated Wraithknight, highlighting the four sets of custom warp vanes.
68. Another angle of the conversion.
69. The pelvis has been modified so that the upper body can be removed. The shape of the hole in the pelvis ensures that the torso doesn't rotate in the socket.
70. The abdomen was modified so that it fits snugly into the pelvis. This means that the Wraithknight can be broken down into two main pieces, both for ease of transportation and to enable me to swap between a regular Wraithknight and a Skathach Wraithknight by creating a new torso and reusing the legs and base.
71. Having decided to change from Craftworld Mymeara to one of my own invention, Miruaun, I resculpted part of the tabard, replacing Mymeara's rune with one of my own design to represent my new craftworld.

72. I wasn't entirely happy with the additional warp vanes behind the Wraithknight's shoulders and I realised that they were too big. I elected to remove the additional sets and replace them with smaller warp vanes, in a similar style to the resin ones that I'd had cast, but with less detail. The Wraithlord warp vanes were ideal for this; the photo above shows an unmodified vane and one that I've carefully modified using a drill, file and crafting knife.

73. The completed pair of warp vanes. I used styrene rod and card to finish the mounting points.

74. A dry-fit of the new warp vanes on the Wraithknight's torso.

75. A view from the rear of the torso, showing the positions of the new warp vanes.

76. The new warp vanes complement the large pair and are a much more appropriate size compared to my original concept.

77. A view fronm the front - the new warp vanes are more subtle, but are still a worthwhile addition, in my view.
comments powered by Disqus